Fall is officially here. There is that unmistakeable something in the air, especially in the cool of the evening, that spicy sweetness unlike at any other time of the year. The shadows get longer as the days get shorter and shorter, which actually gets me excited for long, cozy fall and winter evenings, working on projects, reading, doing those sorts of things that are just about done away with during the long days of summer.
Baking isn’t what I generally gravitate towards in the kitchen, but with fall in air and fresh pumpkins being harvested out of the garden, what better thing to bake than these delicious pumpkin chip muffins! I don’t go for pumpkin spice, but this just tastes like fall to me.
Ingredients
2 c. pumpkin, mashed or pureed (or a 15 oz. can of solid pack pumpkin)
4 eggs
2 c. sugar
1 stick salted butter, softened
1 c. coconut oil, melted
3 c. flour
1 t. baking powder
2 t. soda
2 T. cinnamon
1/2 t. salt
2 c. semisweet chocolate chips
2 T. vanilla
1 c. finely chopped walnuts (optional)
Instructions
Beat together the first five ingredients, until smooth. Combine dry ingredients in a separate bowl and gradually add to the pumpkin mixture – Mix well. Add vanilla. Fold in chocolate chips and walnuts.
Scoop roughly a quarter cup of batter to each cup in your muffin tin, either greased or lined with muffin papers.
Bake at 400 degrees F. for 15-18 minutes.
Cool for 10 minutes and then place individually on cooling racks. Recipe yields roughly 2 dozen muffins.
Notes
This recipe can be made with or without muffin papers, obviously. I much prefer using the papers, since these are pretty crumbly and moist when they’re warm, so it is a lot easier to handle them in a muffin paper. You can use just about as many chocolate chips as you want…I’ve done anywhere from 2 to 3 cups. It just depends on how chocolately you want them! I have also put a few tablespoons of cocoa powder in the batter, if I’m feeling the need for something extra chocolately. They no longer look like pumpkin if you do that, but they’re delicious all the same. If you want an extra kick of pumpkiny goodness, add a little more pureed pumpkin. Play with the amount of cinnamon and vanilla. I think my original recipe called for something silly like 2 teaspoons of cinnamon. I like to actually taste the cinnamon, thank you very much! You can also use white whole wheat flour for this, and I’m sure you could use regular whole wheat, although I imagine the texture and density would change.
These keep pretty well in the fridge and are delicious warmed up in the microwave for 10 seconds, with a little dab of butter.
Enjoy this taste of fall!
Support Song Dog Journal and share to social media!
Okay, so this barely qualifies as a recipe. It really doesn’t. But there isn’t another comparable word for a “handful of this, handful of that, shake it up” sort of concoction. But it has become one of our favorite quick snacks! Not to mention, this old coffee cannister is pretty nostalgic for me – It recalls years of memories of my grandparents and their delicious chocolate chip cookies, since this served as their cookie jar as far back as I can remember.
Anyway, Brad and I eat a lot of nut mixes and trail mixes. We come in from chores or cow work and just need a quick snack mid-morning, and a handful of something, oftentimes peanuts or cashews, generally does the trick. We had found a couple of really good trail mixes at Sam’s Club, but we ate enough of them that I finally decided I wanted to start just mixing our own trail mix. As silly or simple as this might sound, we enjoy the homemade version better than the store bought versions.
Pick from a variety of nuts, M&Ms or chocolate pieces, and dried fruit, add desired quantities and shake it all up! You can go sweet or savory, with seasoned or unseasoned nuts, roasted or raw, salted or not, and the list goes on. If you want to get a little fancier, you could toss your mix with a little olive oil and a seasoning of your choice, and bake briefly in the oven. The possibilities are endless.
This one is peanuts, almonds, M&Ms, and raisins. There were supposed to be cashews, but I think I accidentally ate them all before I got around to mixing this up. I made a second jar for myself without raisins. Brad pointed out that there were twice as many M&Ms in my jar as in his jar, but I pointed out that he got all the raisins. Fair’s fair.
Support Song Dog Journal and share to social media!
She really does have as much personality as it looks like in this picture. As a chick, even just a week old, she was feisty and would frequently attack my hand when I reached into the brooder. A chick can’t really do any damage, but fast forward a couple of months and I had started wondering if Amelia was actually a rooster. Once she flew at me and to my surprise made it about to eye level, which was a little startling.
Well, Amelia has since started laying eggs – the most beautiful blue eggs, as a matter of fact – so clearly she isn’t a rooster, but prior to that she was really just a pain. Literally a pain. She’d run up and peck at my hands and fingers or anywhere else she could find to peck, and I got sick of it pretty quick. And by “peck,” I really mean that she’d run over and grab me by the finger and just hang on. It was annoying. Finally one day she ran up and bit me pretty hard, so I grabbed her by the legs and held her upside down and spoke sternly to the little wretch. She didn’t like that. But she tried the same stunt again and received another round of being held upside down by the legs.
It took one or two more of these little confrontations and she eventually got the picture. She settled down. One might think she’d behave herself sullenly and sort of keep to herself and away from the mean lady who grabs her and hangs her upside down, but that would be incorrect. Amelia is now the first one to greet me whenever I come into the chicken coop, and basically begs for attention. She loves to be scratched on the head. And hugged. Yes, hugged.
A little tough love goes a long way.
Support Song Dog Journal and share to social media!
A well-tended perennial garden has a beauty all its own, and thejoy of it is amplified in that it keeps coming back, and keeps coming back, and keeps coming back! Perennials tend to get ignored in the springtime fury of planting, since most people fall for the immediate gratification of copiously-blooming annuals displayed at the greenhouse. Perennials tend to bloom later and don’t get the showcasing that annuals do….Not until the middle or end of the summer when the annuals have all had their hayday and perennials are still shining or just starting to!
The ease and flexibility of planting annuals in a container is pretty appealing to a lot of folks, especially if they don’t already have a garden bed ready for plants but, if at all possible, perennials are the way to go and, tended well, will come back for years to come. It is really amazing to me that sometimes all that is left of a homestead from the late 1800s or early 1900s is a hedge of roses or a few lilac shrubs, still blooming joyfully 100 years later. In fact, the lilacs Brad and I have outside our house are transplants of some lilacs blooming about a mile and a half away on top of a hill. The lilacs and some irises are all that remain of someone’s life on that little piece of hill country.
I was able to get my perennials in the ground early this summer, shortly after Brad and I got married, and planted a few from seed later in the summer, but fall is actually a great time to plant perennials. So I thought I’d share a little bouquet of my favorites.
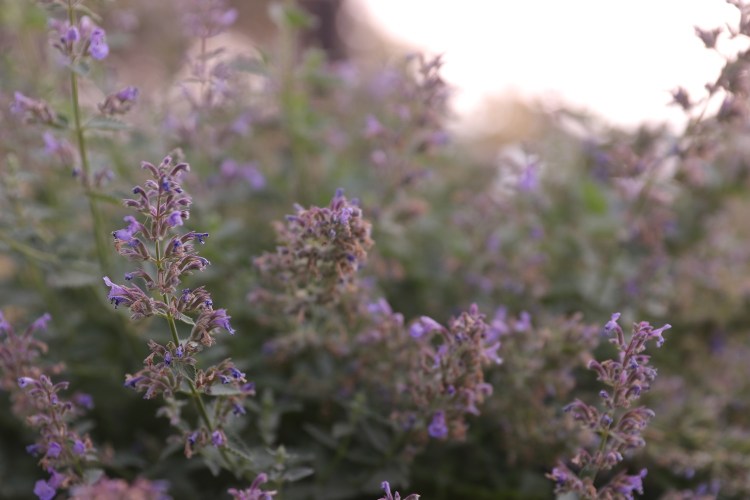
Catmint. Not to be confused with catnip, which is a completely different plant, this perennial is one of my favorites in the garden. It is hardy, basically grows without any effort, and is a wonderful filler! Unlike some perennials which bloom and then are done, catmint seems never to stop. It can also be sheared in the middle of the summer after its first bloom if it is starting to look scraggly, and will grow back fuller for a second round of blooming. I bought a few catmints in tiny 2 inch pots back in June and these plants are now generous 18 inch bushes. They tend to get wider than they do tall, so they kind of work just about anywhere in the garden, and as I said above they make a great filler. Absolutely beautiful. A bonus is that the pollinators love these flowers. Another bonus is that, due to their fragrance, deer generally don’t mess with them. (Deer proof plants are a myth. They don’t exist. But there is such a thing as generally deer resistant, and plants with a pungeant aroma are generally less likely to be munched on by deer.)
Salvia. This is another one I just love. The typical shade is kind of a violet blue, but lately growers have developed some really wonderful shades of pink. In general, I’m not a pink person at all, but some of the salvias are just delicious rich berry colors. This plant does best with regular deadheading. Each blossom spike can be snipped back when spent, down to the first pair of new leaves, and this will encourage reblooming. This is another drought-resistant and deer-resistant plant, but is less forgiving than catmint. Salvia doesn’t get hugely tall, so it works well somewhat offset from the edge of the garden, but not too far back.
Yarrow. This is an easily-recognizable flower, if you pay any attention to native wildflowers, and the domestic varities have been bred for some gorgeous colors. Wild yarrow is white with occasional pink, but I was excited to plant one variety that blooms red and fades to yellow, and another variety of more subtle shades of pink and white. This is yet another drought-resistant and hardy perennial, and it blooms forever in the later summer! It has some height to it, so it makes a great middle of the garden flower.
As much as I love the change of seasons, I’m bracing a little bit for that first killing frost we have, since I’m enjoying my garden so much this summer! But it will be just delightful to see how everything comes back in the spring. Gardening is possibly the epitome of hope and optimism!
Support Song Dog Journal and share to social media!
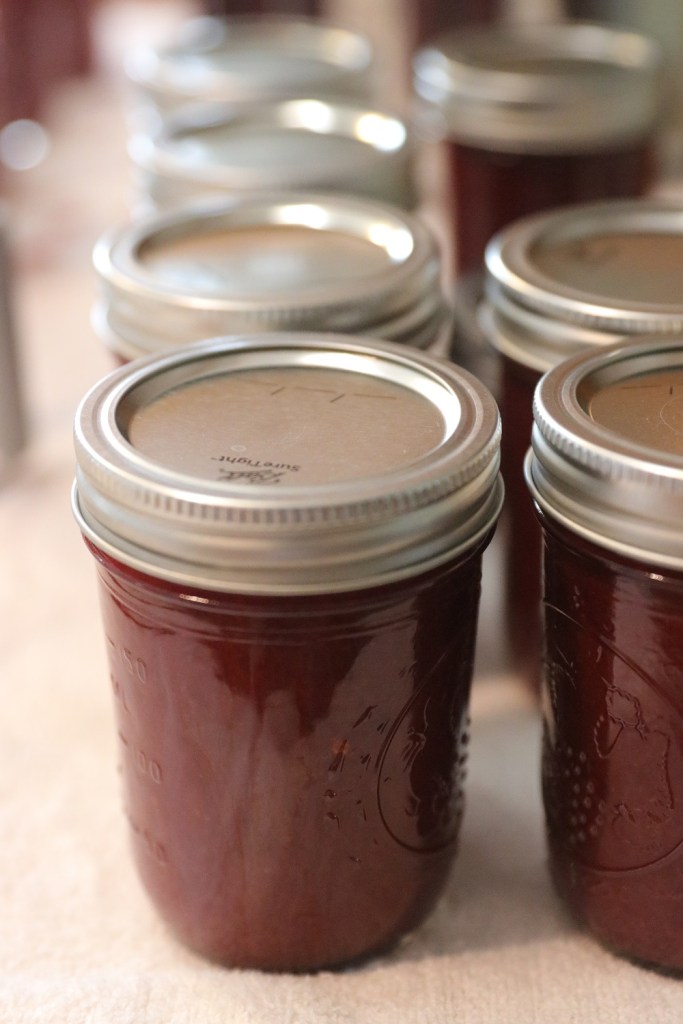
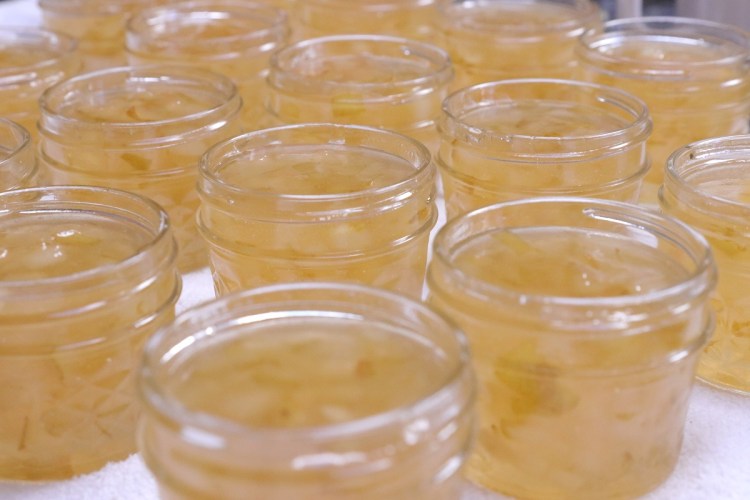
I absolutely love to can. Love it. I enjoy the simplicity and heritage nature of the task, I love the fragrances that fill the house, and the satisfaction of rows upon rows of glistening, beautiful jars of jams, jellies, butters, salsas, and sauces. And I love tasting the fruit of that work months (and sometimes years) later.
But canning can be a daunting task. Here are some tips and tricks that I’ve picked up over the years for helping my work day to go smoothly and enjoyably. Like with most things, I’m guessing everyone who has canned for any length of time has developed their own methods and tricks, so I am not claiming any expertise, only sharing what works for me!
1. First and foremost, have a plan! This may seem like an obvious one, or perhaps not, but unlike a lot of kitchen-related projects, until you’ve been canning for awhile there are a lot of things you might not readily have on hand, or things that don’t get replaced often and maybe expired since the last time they were used. Make sure you have what you need. The last thing you want is to get neck deep into a canning recipe and realize your lemon juice is a year out of date or not have your jam set up because the pectin was three years old! Canning is laborious enough without those added inconveniences.
2. Have the right equipment. Although you don’t technically need a specific water bath canner and jar rack, and although you can use a regular old stockpot and either a trivet or towel in the bottom for the jars to sit on (options I resort to if I have a multi-batch of something, especially since two water batch canners would hardly fit on my stove…), it really does help if you have some very basic equipment. Aside from the canner and canner rack and the jar picker-upper, my can’t-do-without tools of the trade are a headspace tool and a jar funnel. These are most definitely optional, but it is amazingly difficult to estimate 1/4 inch headspace correctly and having a funnel sure makes it easier to keep the jar rims and threads clean!
3. Be redundant. Although there are many situations where more is NOT better, I find that in canning, it is always best to have extra. Of just about everything. If you’re just getting started in canning and you don’t have a large stash of jars, splurge the extra $12 for an extra package of jars, just in case (they’ll get used!), and get an extra package of lids as well. You never know when your plan you so carefully laid above goes a little off kilter. A batch of whatever you thought would make six half pints turns into ten, but you only planned for six jars! Keep extra of important ingredients like pectin, sugar, and lemon juice. You bought that 1lb bag of sugar instead of the 5lb bag, but you made a huge batch of cookies for church potluck and now you are short, or you spilled your coffee all over your pectin and spoiled it. It creates unnecessary hassle to run out of ingredients midway through (goes along with having a plan). Have a few extra large bowls on hand, an extra stockpot ideally, spatulas, ladles, etc. I always surprise myself how many different spatulas or bowls or measuring cups I end up using (usually because I end up tasting something and throwing the utensil in the sink).
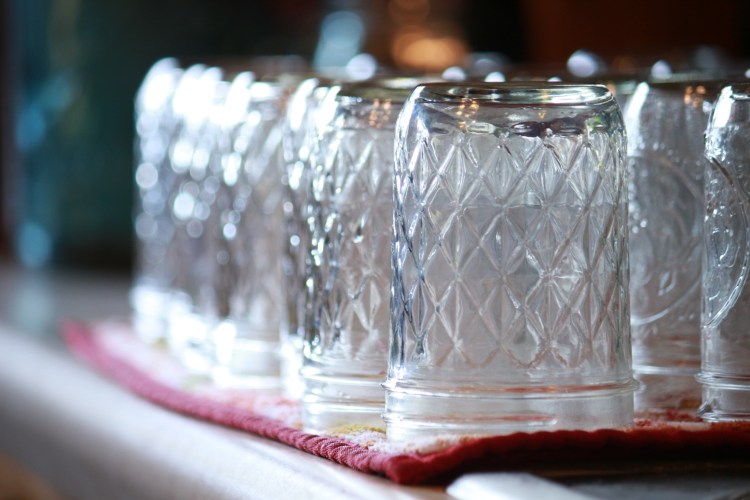
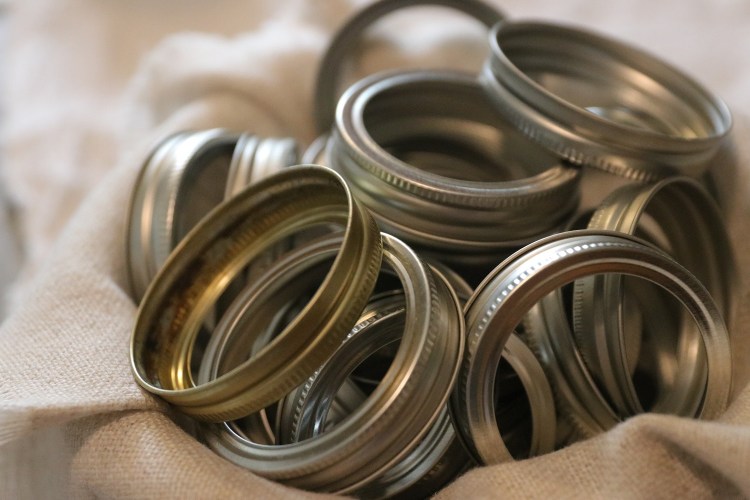
4. Do as much prep as possible ahead of time. It’s annoying to be on a roll getting things going, only to come to a stand still because I forgot to round up my jar rings. Or for the project to take two hours extra because I didn’t realize how difficult the fruit would be to prep. Wash your jars the night before so you don’t have to do that while you’re trying to get going on your food prep. Prep the fruit and veggies the night before as well. Not having to spend 3 hours pitting plums or grating zucchini sure speeds everything up.
5. Get an early start! For one, you beat the heat. There’s nothing like standing over a steaming canner or stirring a jar of hot sauce when the temps in the house are creeping up. I love to work with the windows open when it is cool outside. For second, I am really, really good at estimating my time multiple hours short of what it actually ends up taking. I’d rather start early and think I’ll be done at noon but really be done at 2:00, rather than starting at noon…you get the picture.
6. Before you do anything else, start heating water in your canner! This is a huge time saver. While it can be tempting to try to be efficient in the stove usage and wait to start heating the water until you think it’ll boil right when you need it, don’t do this to yourself. Go ahead, let it boil or at least get close, and then just keep it at a simmer until you’re ready for it. It is annoying to be ready to process filled jars and the waterbath canner isn’t hot yet. And a watched canner NEVER boils. It might have been ten minutes away from ready but if you need it now, it will take an extra hour to heat up, just for you.
7. Let your jars heat with the water. This relates to hot prepared foods. And no, this isn’t to sterilize them. Sterilizing is no longer recommended for food products that will be processed for at least 20 minutes, but this more an immediate safety issue, and saves you from ruining a batch of something by having a jar break. Keeping the jars hot gets them ready to fill with the hot jam or sauce or whatever it is, and then they’re also less likely to break when you return them to the waterbath.
8. Put a splash of white vinegar in the water bath. This is one of my favorite little things to do because it really does pay off in the end! We are on a well and have delicious water, but with that comes a high level of minerals that leaves an unattractive white filmy sediment on all my beautiful jars. A splash of vinegar makes for clean jars. Save yourself the headache of having to wipe everything down later!
9. Clean those rims! Really! Don’t shortcut this task. It is very frustrating to be three minutes away from being done with a project that has taken half or all of the day, only to not have jars seal because I failed to clean the rims well! Save yourself the headache.
10. Keep a tidy workspace. I dislike working in chaos, so keeping things tidy helps me work more efficiently. I like to have all my clean jars in one spot, my jar lids and rings ready to go nearby, and towels covering all my counter space to make cleanup easier. I keep track of my dirty dishes and bowls and utensils and try to keep them from scattering, and get things soaking as soon as they’re emptied. Cooked sauces and jams or butters can really cook on to whatever they were in, so don’t wait until the very end to start thinking about cleanup on them. There can be quite a bit of downtime while canning, so putter away at those dishes so you can wrap up when that last jar pings!
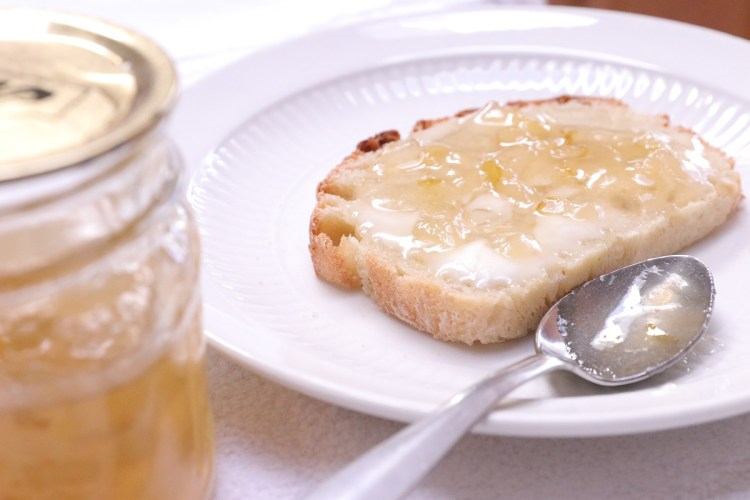
11. Last but not least, taste and enjoy. There’s nothing like slathering a slice of toast with my own fresh jam or dipping a tortilla chip in fresh salsa. You won’t be regret having some good bread or a bag of tortilla chips on hand, for just such an occasion, and your family will thank you as well.
I hope this little list can help streamline your projects, and maybe make canning feel a little less daunting!
What other tips and tricks would you share with other canners? Leave a comment below!
Support Song Dog Journal and share to social media!
As of yesterday, Brad and I have been married for three months. Wonderful months. In some ways, it hardly seems possible that we’ve been married for that long, and on the other hand it feels as if we’ve always been married. What a blessing and a gift, and how unexpectedly beautiful it has been!
For three months we have looked forward to “when things slow down.” Things will slow down in July, we said. Things will slow down in August, we said. With one thing and another, they surely didn’t slow down, and we’re now in the midst of the whirlwind of fall cow work. Between being a wife, keeping chickens, cultivating a garden, and working alongside my husband, I can safely say I have never been busier! It has been a joy to start getting involved in this community, helping with the county fair, cultivating church relationships, continuing to volunteer with the fire department.
So I’ve been well-occupied. And I can also honestly say I’ve never been happier. Yet in those busy times, it can be easy to do too much looking ahead, and not take the time to sit back and marvel at God’s blessings and how He sustains and provides. Day to day, minute to minute, this life is a blessing, and is amazingly unguaranteed in an earthly sense, but beautifully guaranteed in a Heavenly one. Don’t ever take a minute of this life for granted.
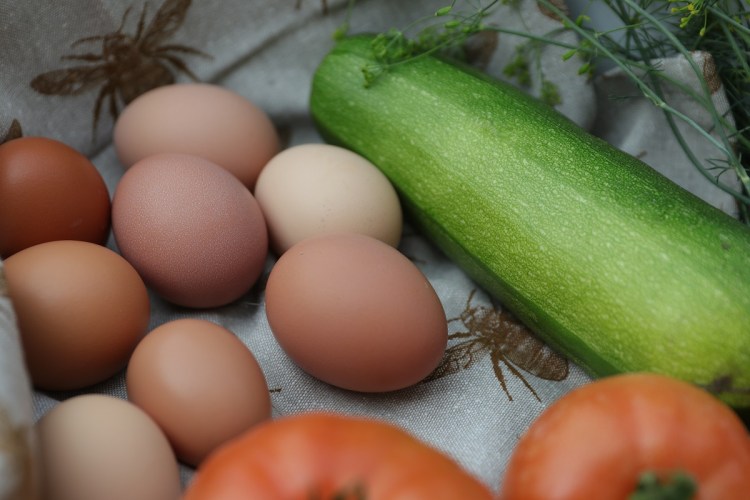
One week I’m bemoaning grasshopper damage in my garden, the next week I’m reaping bounty. One day I’m celebrating the simple joy of a half a dozen eggs, the next day I’m praying my way to the ER with my husband, after a terrifying shop accident. A rough day for any wife (but especially a new one) ended in the sweetness of relief that the ER outcome was stitches and no more, and listening to the music of rain on our roof. One day ended with tears of exhausted relief and the next day began with the sweetness of waking up next to my favorite person and finding 2 inches of rain in our rain guage. So many prayers answered and so much of God’s faithfulness from one sunrise to the next!
One week we’re praying desperately for rain while watching the dams go dry, the next we’re celebrating water in the dams. One day we’re working cows with neighbors, enjoying the camaraderie of the ranching community, the next we’re gathering up my father-in-law from an ATV wreck in a distant pasture and getting him to a waiting ambulance. That same community we enjoyed the day before dropped their whole evening when they heard about the ATV accident, helping at the wreck and then after, shuttling dogs back home, even rounding up my chickens and putting them away. What a wonderful community we live and work in, and how comforting to see the ways in which God provides the right people at the right time to accomplish His plans.
One week we’re feeling the summer slump with less to keep us busy (yet somehow still with plenty to keep us busy), the next week we’re methodically working our way through the ranch, strategizing accomplishing everything while being down a person, and getting ready for a weekend of cow work.
As I’ve mulled over the last couple of weeks, I’ve been struck by the way in which God will bring a significant trial, or a series of them, but wrap them around with His goodness. The last two weeks have been exhausting, emotional, frustrating, uncertain. Yet they have been brim-full of the simplest of pleasures. The purest of joys. The love of a husband, a family and community. What a crazy, wonderful life this is. What a wonderful God we serve.
And it is a glorious thing, to find where you belong, and to be where God wants you to be.
Support Song Dog Journal and share to social media!