Recipes | Wild Plum Jam

The wild plums are sure bountiful this year! I don’t know what they were like last year, but this year has been amazing. I went picking again this morning with a friend, and we picked about 6 gallons of plums! I couldn’t believe it. When we drove up to the (secret) plum thicket, my heart sank a little, since the branches seemed awfully bare. But we climbed down into the thicket and the ground was covered with beautiful, firm, ripe fruit. Most of what we picked we actually picked off the ground. The plums that were still on the tree were barely attached and just fell off into our hands, or fell to the ground as we shook the branches.IMG_4288e
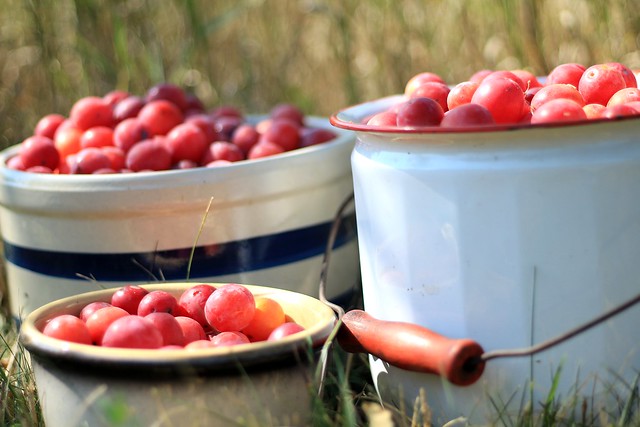
Yesterday, I finished processing my first batch of plums as plum jam, and it did not disappoint. Here is the recipe, the process adapted from a recipe on Kitchn and a Sure-Jell recipe.IMG_4270eIngredients

  • ~1 gallon of plums
  • 1 box powdered pectin
  • 8 cups sugar
  • 1/2 tsp. butter (optional)

Process

Wash plums and cut off bad spots. In a stockpot with about a half a cup of water, cook the plums with pits, stirring constantly to prevent scorching. Bring the mixture to a boil and cook for about 5 minutes, mashing the fruit as you go. A potato masher can also be used to help loosen the pits. When the plums have reached a sauce-like consistency, remove from the heat and pull out the pits, leaving as many of the skins as possible. Use an immersion blender to blend the pulp and chop up the skins. Measure out 6 cups of pulp. There will be extra. In a stockpot, combine the plum pulp and the powdered pectin. Add butter if desired to reduce foaming. Bring mixture to a rolling boil, stirring constantly. Mixture should continue to boil even while you are stirring. Add the sugar. Return to a boil, and cook for one minute, stirring constantly. Remove from heat and allow to cool for a minute or two. Skim off any foam that forms, and save for a taster.

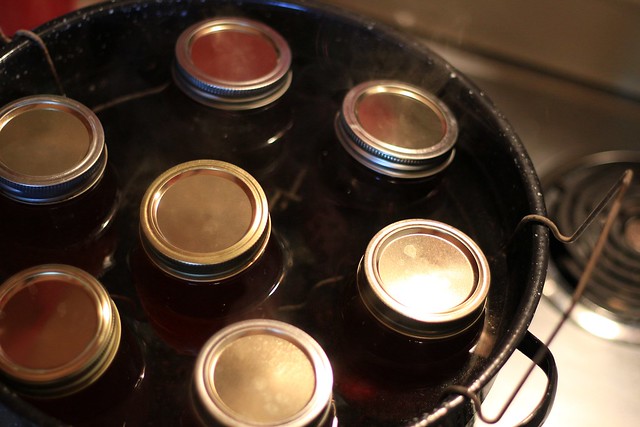
Pour into prepared jars, clean the rims and threads, and seal jars with two-piece canning lids. Process 10 minutes in hot water bath (I adjusted for altitude and processed for 15 minutes).IMG_4272Notes

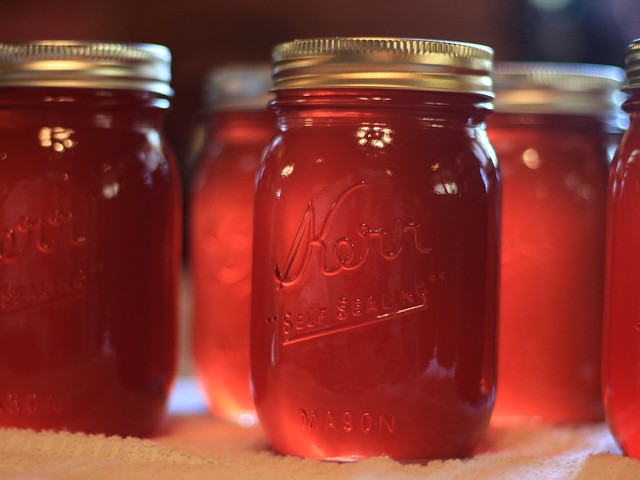
Jam differs from jelly in that jelly uses only the juice, while jam uses all of the usable fruit, including the skin. Plums can be pitted before or after cooking. Either way is bound to be tedious. I left the pits in and after an hour of pulling the pits out, I was almost in tears. Part of that may have had to do with the fact that I didn’t start processing them until 11:00 pm, so it was 1:00 am and I was still pulling pits out. So it was bad timing. If I make jam again, I don’t know if I will leave the pits in and cook them, or pit them ahead of time. I may try to use a ricer, which would unfortunately pull the skins out, but would at least make it easier to separate the pits and the pulp. It would be worth a try. IMG_4281eI had never made plum jam before, and I don’t know if I have ever even eaten plum jam before. But it is exquisite on bread with a generous quantity of butter. Enjoy!


Recipes | Crabapple Syrup

Finally! Fruit processing season has been here for a few weeks now, and I am thrilled to report a few new recipes that have been added to my recipe collection. This recipe for crabapple syrup is adapted from one I found on the Backyard Forager website – here is the original article and recipe. I have my own method of juice extraction, but I needed the sugar-to-juice ratio and the cooking and processing time. It is a wonderfully tangy syrup, and I look forward to using it on or in a number of things – yogurt, pancakes, icecream or sorbet, lemonade or iced tea…The list could be endless.

Ingredients

10 c. crabapple juice

10 c. sugar

1.5 T pectinIMG_3892Method – Combine all ingredients in a large pot. Heat the mixture to boiling and simmer for 5 minutes, stirring constantly. Remove from heat and allow to cool slightly. Skim foam off the top and save the skimmings for a taster. Pour syrup into sterile jars. Clean rims and threads, and seal with two-piece canning lids. Processes for 1o minutes in a boiling water bath, or adjust for altitude. I processed the jars for 15 minutes, since we are at ~3600 feet above sea level. Yields about 7 pint jars.IMG_3906Notes – I added the pectin in the hopes of thickening the syrup a little. The original recipe doesn’t include any pectin. The chokecherry syrup I made last year was very runny, even though it included pectin, and I liked the consistency even though other family members didn’t. Crabapples have a fair amount of natural pectin, so I was hesitant to add too much pectin and end up with jelly rather than syrup! However, the 1.5 tablespoons didn’t really do anything. After thinking about it, I realized it was kind of a joke that I even thought that little pectin would do anything at all to that quantity of juice and sugar, but math and ratios (yes, simple math, I know) are not my strong suit. They aren’t even my weak suit. They just aren’t. Period. I also added a splash of lemon juice, and could have added more (go back to math not being my strong suit). As far as the headspace, I left about a half inch of headspace, which might be a little much, but I don’t think it will matter. I probably could have gone with 1/4 inch.

There is something exceedingly satisfactory about the process of home canning. I’m so glad it is that time of year!


Recipes | Wild Rosehip Jelly

There is something mysteriously delightful about the process of gleaning from Creation’s garden and being able to process and store and enjoy the homemade food. It was chokecherries earlier this summer, and now it is rosehip season. IMG_1582Last summer while hiking, we found a huge (secret) area of wild rose brambles, laden with the beautiful red-gold fruits of the rose. By the time we got to them, though, it was quite late in the season and many of the fruits were overripe and dry, so we really didn’t get enough to do anything with them. This year, however, we hit them at their peak! Mom and I spent an hour or two west of Custer picking rosehips, and came home with about 3 quarts of fruit. Harvesting rosehips isn’t as productive as harvesting chokecherries, but it is worth it. This afternoon, I processed the hips and turned them into the most beautiful honey-colored jelly. It is recommended to pick rosehips after the first killing frost for the best sweetness – Custer had it’s first frost back in August, at which point I doubt the hips would even have been ripe. Either way, the jelly is very flavorful. I found the jelly recipe online, since this isn’t an inherited project!
IMG_1588Wild Rosehip Jelly

8 c. rosehips, with stems and ends removed (should yield 3 cups of juice)

1/2 c. lemon juice

1 package pectin

1/4 tsp. butterIMG_1590Juice Extraction: In a large pot, cover rosehips with water and bring to a boil. Boil for about 20 minutes, mashing fruit to a pulp as it softens. Rosehips contain tiny fibers or hairs around the seeds, which can cause irritation to the throat, so these must be strained out. Strain fruit pulp through a cheesecloth-lined collander or a jelly bag, saving the juice and setting the pulp aside. Put pulp in a pot and again add water to cover. Simmer again briefly and strain again. Discard pulp. If necessary, use fruit pulp and water once more to get to the necessary 3 cups of juice. For every 8 cups of rosehips, you should get at least 3 cups of juice – I used 12 cups of fruit, roughly, and easily had enough juice for a double batch. Juice extraction is not a science. There are many methods! IMG_1674Jelly: Add 1/2 cup lemon juice to 3 cups rosehip juice. Stir in 1 package of powdered pectin. Stir well. Let the juice mixture come to a rolling boil, stirring constantly. Once it boils, stir in the 3 1/2 cups of sugar, stirring constantly. When sugar has dissolved, add 1/4 tsp. butter, to prevent foaming. Bring to a hard boil. Boil for 1 minute, stirring constantly. IMG_1679Remove from heat. Let sit briefly and skim, keeping the skimmings for a taster. Pour into sterilized jars, leaving 1/4 inch head space, and seal with two-piece canning lids. Process in a hot water bath for 10 minutes. IMG_1681Jelly making is rather captivating – I am planning a trip back west of Custer to pick more rosehips this weekend!

Laura Elizabeth

Recipes | Great-Grandma Sarah’s 24-Hour Dills

Due to late planting, we don’t really have much in the way of garden produce just yet – We’ve gotten a few zucchinis, a couple of cherry tomatoes, and a tiny handful of strawberries. And lots and lots of dill. The dill volunteered this year, so we left it as a pest deterrent. Unfortunately, though, we don’t have any usable cucumbers. So the girls and I drove in to Rapid to the farmer’s market this morning and picked up a few bags of pickling cucumbers and fresh garlic, and picked the dill fresh from our garden!

Twenty-four-hour dills are a generational favorite –  Guaranteed to be ready in 24 hours, although Great-Aunt Margene says they can be ready in 12 hours. Make them in the morning and serve them at dinner! This is my great-grandmother Sarah Adrian’s dill pickle recipe.IMG_9609Grandma Sarah’s 24-Hour Dills

About 20 small-medium sized cucumbers

1/2 c. vinegar

1/2 c. pickling salt

6 1/2 c. water

dill, garlic gloves, and hot pepper, crushed red pepper, onions, or any other ingredients to tasteIMG_9615
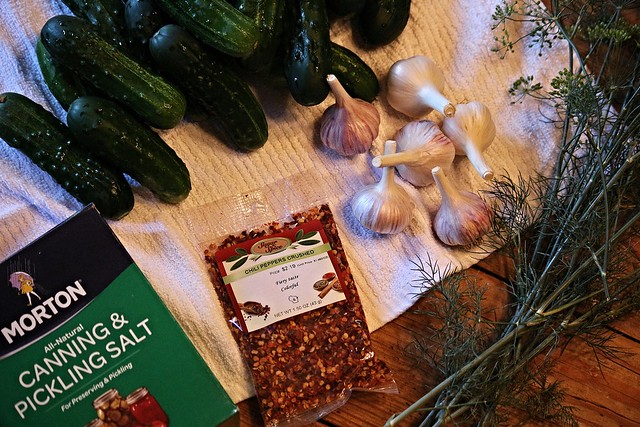
Combine the vinegar, salt, and water – According to Great-Aunt Margene, the solution doesn’t need to be boiled. However, I remember boiling it in the past, so I deviated from the recipe and boiled the brine. Wash cucumbers. Slice in spears, but leave attached at ends. Slicing them allows them to be properly steeped in the brine after 12-24 hours.IMG_9617
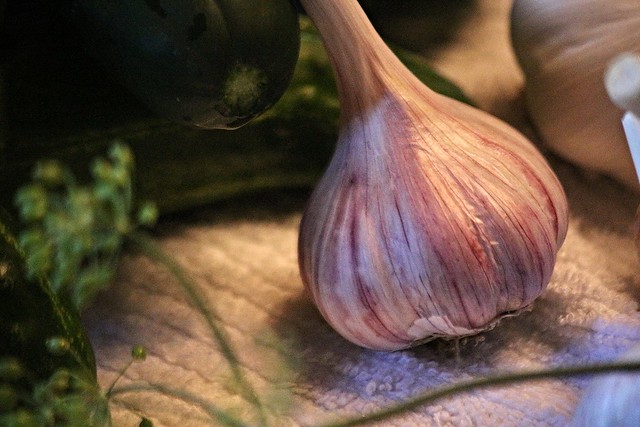
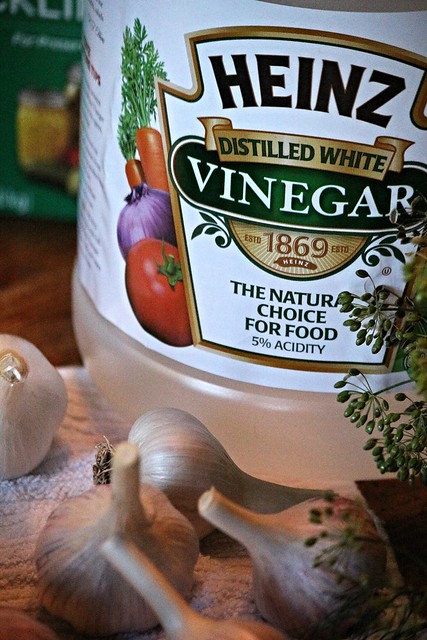
Pack cucumbers in pint or quart-sized jars, with garlic and dill (and whatever other ingredients you are using) layered with them.  Pour the brine over the cucumbers, and seal jars. Let sit for 24 hours, or to taste.IMG_9626
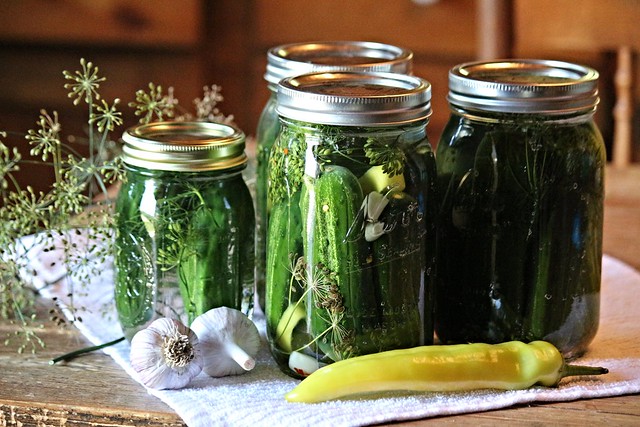
I made one jar with the standard recipe, just garlic and dill, but the other two jars I dressed up a bit – One with crushed red pepper, the other with crushed red pepper and a few slices of hot banana pepper. It will be fun to see how those turn out. I made a little extra brine for a tiny jar for Grandma.

Enjoy!

Laura Elizabeth


Save

Recipes | Grandma’s Chokecherry Jelly

Canning is a skill that has nearly faded out of reckoning, but it is a useful and satisfying skill to have. And nothing beats homemade jams and jellies! Chokecherries have produced abundantly and early this year, and can be found growing all over the Black Hills. We picked and processed pounds and pounds of berries from our bountiful chokecherry harvest, and turned them into jelly, using Grandma’s recipe (slightly modified), which made it even more fun!IMG_8648_small

Grandma’s Chokecherry Jelly

1 pound of ripe fruit or 4-5 cups of berries (should yield 3 cups juice)

1/2 c. lemon juice

1 package powdered pectin

4 1/2 c. white sugarIMG_8644_small

Juice extraction: Put 1 pound of ripe fruit (4-5 cups of berries) in a large pot and cover with water. Simmer for 15 minutes, crushing the berries as they soften. Don’t crush the pits, since they are toxic. Strain fruit and water through a colander, jelly bag, or cheesecloth, saving the juice and setting the pulp aside. Put pulp in a pot and again add water to cover. Simmer again and strain again. Discard pulp. (For every 4-5 cups of berries, you should get at least 3 cups of juice. If necessary, use fruit pulp and water once more to get to the necessary 3 cups of juice. )IMG_8654_small

Jelly: Add 1/2 cup lemon juice to 3 cups chokecherry juice. Stir in 1 package of powdered pectin. Stir well. Let the juice mixture come to a rolling boil, stirring constantly. Once it boils, stir in the 4 1/2 cups of sugar, stirring constantly. Bring to a rolling boil. Be careful, particularly if you have an electric stove! The juice and sugar can boil over fast! For this part of the process, an extra pair of hands is helpful – One pair to add sugar and stir, and another pair with hot pads, ready to take the pot off the stove if it begins to boil up. Let boil for 2 minutes, stirring constantly to keep it from scorching.IMG_8664_small

Skim the foam off the top. The skimmings are edible, though not can-able! Put jelly in sterilized jars, leaving 1/2 inch head space. Process in a hot water bath for 10 minutes. IMG_8672_small
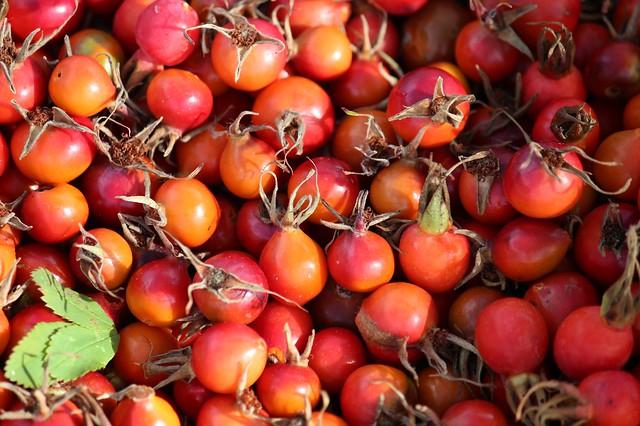
Chokecherry jelly has become my favorite – I’ll be saving a jar back to enter in the county fair in a few weeks!

Laura Elizabeth