In the Coop | What Breeds?

If you’re just getting started with your chicken keeping endeavors, it can be daunting to know where to start when it comes to breeds of chickens. There are a TON of different ones. How in the world do you pick?

Before we jump into the different breeds and classifications, ask yourself what your goal is with your chicken keeping. How many birds do you want? And why do you want them? Some people want the biggest bang for their buck with the highest producing layers intending to sell eggs. Some just want enough for eggs for their family. Others are into the showier, fancy breeds for the novelty factor, and aren’t as concerned about high egg production. Some are chasing that “rainbow dozen” and want a colorful egg basket each day. Whatever your interest, whatever your goal, there’s a way to do it!

Goal: Egg Production

If you goal at the end of the day is high production, then you want to look at “production breeds.” Examples of these are the sex-link, hybrids developed to have different colored chick plumage for pullets and roosters, making them identifiable as soon as they hatch. Different hatcheries sometimes come up with their own sex-link hybrids, but some common ones are ISA Brown, Red Star, Amber Star, Amberlink, and Black Sex Link. These are the BEST of the egg-layers, able to produce upwards of 300 large eggs per year, which is insanely impressive. Another favorite of the production breeds is the White Leghorn, which lays white eggs, also in the upwards of 300 eggs per year range. There are also many heritage breeds that are good layers, but oftentimes they are heavier birds requiring more feed, so that can drive up the cost of egg production. They, however, may have more longevity in their laying career.

Goal: The Rainbow Dozen

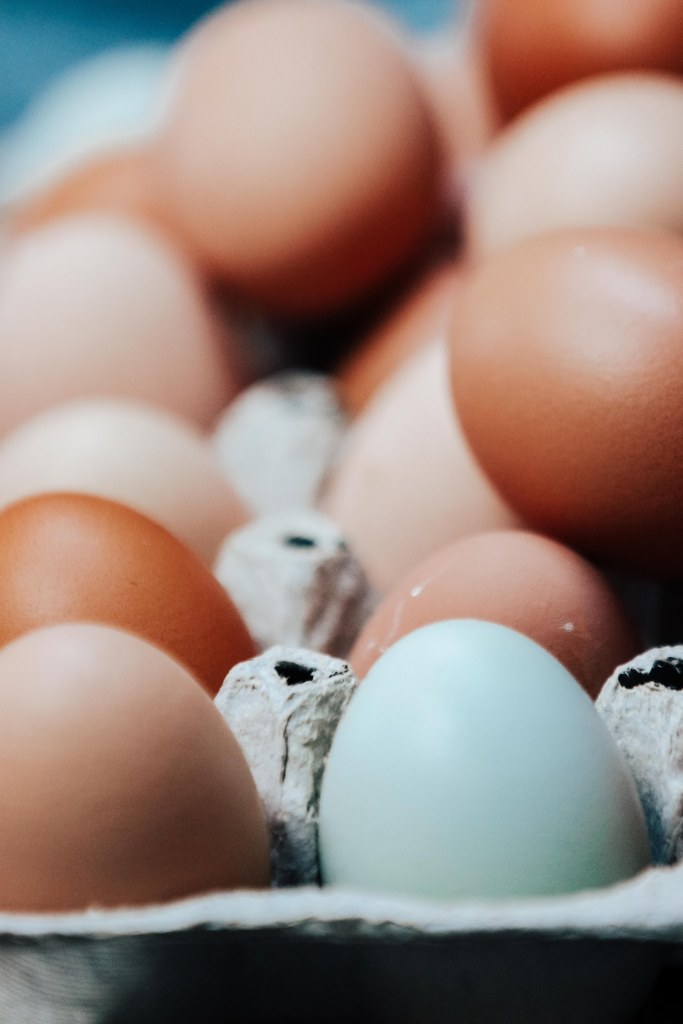
Who doesn’t love the look of a beautiful, colorful egg basket? Shades of rosy brown and light tan, dark brown, blue, sage green, all make for a beautiful presentation. If you’re not sure where to look for some of the unique colors, here are some suggestions. Ameraucanas will give you beautiful light blue or green eggs, and will lay lots of them. Cream Crested Legbars are another blue-laying variety. “Easter Eggers” will lay just about any colored egg. Americanas (notice the spelling difference) are a hybrid and not a true breed, and are essentially an Easter Egger that isn’t an Easter Egger (which also is a hybrid and not a true breed). There is a lot of ambiguity surrounding the Ameraucana/Americana/Easter Egger conversation! The hybridization is pretty extensive as breeders have developed hybrids for consistent shell colors. Hoover Hatchery’s Prairie Bluebell Egger is bred for blue eggs, while their Starlight Green Egger is bred for green eggs. You’ll hear other names like Olive Egger, Cherry Egger, etc. If you want those super dark, chocolate-brown eggs, look for Marans (any variety) and Welsummers. Red Stars also lay a rich brown egg, not as dark as Marans, but they are the darkest in my egg basket! Buff Orpingtons give a nice peachy tan egg.

Goal: Eggs and Meat

Some birds are considered dual purpose, and can be raised for egg production as well as meat. Examples of these dual purpose breeds are Buff Orpingtons, Sussex, New Hamshires, Partridge Rocks, and Wyandottes. These will be good layers as well as big enough to raise for meat. They’re heavier birds, so they will require more food.

Goal: Meat

If you aren’t looking to get eggs but instead want breeds for butchering, you’ll be looking at the broiler varieties. Keep in mind that these birds are time-sensitive. Some of them are bred so that they are ready to butcher in as little as a few months, and their quality of life significantly decreases when they get past that point, as their bodies get too big for their legs and they lose the ability to move. These would be your “broiler” and “roaster” varieties, such as the Delaware Broiler, Ginger Broiler, etc.

Goal: Funny Pets that Lay Eggs

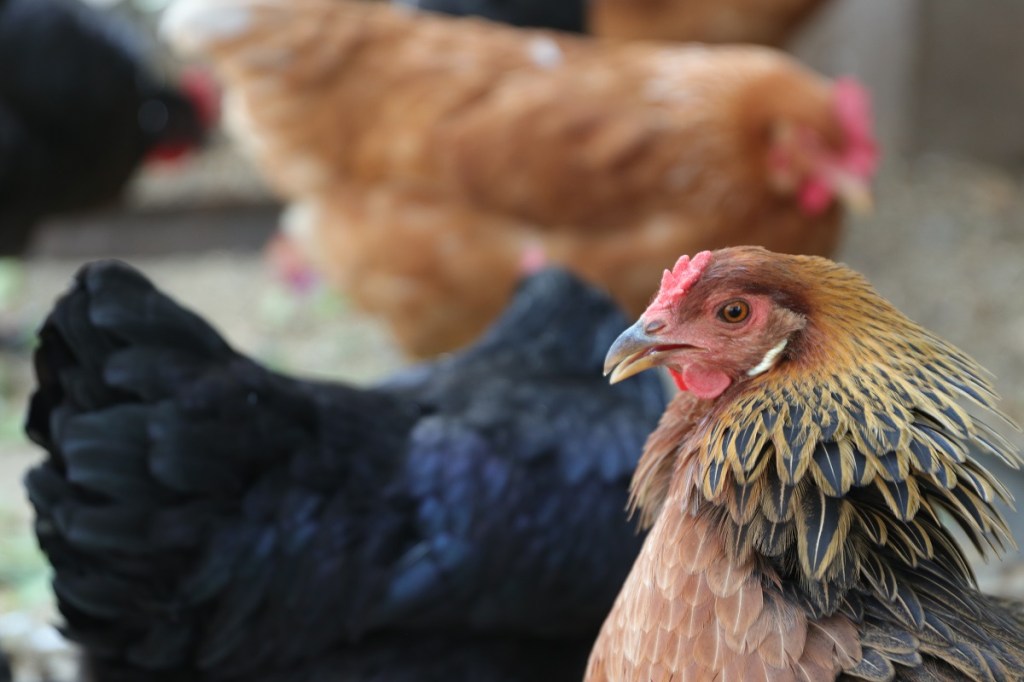
Maybe you really want to build a flock of sweet, friendly birds that will be more or less pets. Some breeds have better dispositions than others. Others are flightier. The friendliest chickens I have had are Buff Orpingtons (basically the golden retriever of the chicken world), Red Stars, and Ameraucanas. I had one Prairie Bluebell hen and she was excellent. Or maybe you would like the novelty of the Polish chickens, also known as the “dance hall girls,” or the adorable frizzle and silky bantam breeds.

Goal: Breeding

If you hope to eventually hatch your own chicks and want to have at least a vague idea of what you’ll get, you might want to steer towards heritage breeds and away from hybrids. Hybrid chickens do not breed true, meaning even if you bred, for instance, a Red Star cockerel with a Red Star hen you wouldn’t get a Red Star chick. Obviously, if you don’t isolate breeds, you’ll end up with hybrids, but if you breed with heritage breeds, theoretically you’ll know what your hybrids are! If you just want the experience of hatching chicks and don’t care how hybridized your “barnyard mix” is, anything goes! Examples of heritage breeds are Buff Orpington, Black Australorp, Brahma, Wyandotte, and many others. If you want to try to breed for shell color in pullets, there are plenty of resources online for knowing what roosters to breed with what hens. For instance, a blue-egg rooster (such as an Ameraucana) bred with a brown-egg hen (such as a Maran) will give you birds with the green-egg-laying gene.

Finally, a reputable breeder will have breed characteristics listed for each chicken, including heat and cold tolerance, ability to free-range well, likeliness to be broody, and temperament in general, as well as a lot more details about the breed.

So these are just some things to consider if you’re wanting to get into chicken raising and don’t know how to pick a breed or where to start!

What are your favorite chicken breeds? Leave a picture in the comments!

.

In the Coop | Simple Brooder Setup

It is that time of year, when you walk into a feed store and hear the telltale cheeping from those bins of day-old chicks. Happy days for those of us happy chicken keepers! That also means spring is coming, which means everyone should be happy when they hear chicks cheeping!

As people are getting into the mode of chick season, I wanted to share a simple DIY brooder box setup that I have found to work really well. It is easy to maintain, easy to clean and access, and is cheap, which is a plus. There is a lot of info out there and a lot of ways to overcomplicate a brooder box setup or make it more expensive than it needs to be. I wanted to give my nuts-and-bolts, budget-conscious setup.

Let’s break it down!

The Box

The simplest form of a brooder box is just a container and a heat source. That’s all you need! No fancy galvanized steel bin or brooder panels are necessary, but of course you can go that route if you so choose. The main requirement is that the box have solid sides, to retain heat. The number of chicks will dictate the amount of space needed, obviously. A large Rubbermaid bin, the 66 quart kind with a locking lid that you can get at Walmart for $10, works really well. I have two bins, and have found that each one can comfortably house about 10 chicks for roughly two weeks. As the chicks grow they’ll quickly outgrow whatever setup you have! The taller the bin, the longer it will take for them to escape.

Even if you are starting with just a few chicks, I’d recommend having two brooder boxes. If you end up with a sick chick or one is getting picked on, or the chicks just plain old take up more space than you expected, then you have a fallback. When I got my August chicks from McMurray Hatchery, I had one chick that needed a little extra care and was glad to be able to almost immediately divide my chicks into two groups so the smaller ones didn’t get pushed around.

The Cover

The cover needs to allow good circulation of heat and humidity in and out of the brooder. For the first few days, a cover is really only needed to keep curious critters out of the brooder box, but after a week tops, the chicks will be actively looking for escape. For a super simple cover, just cut a large opening in the plastic lid with a reciprocating saw and cover with window screen, tacking the edges down with gorilla tape. We made one cover this way, and another using lath and screws to fasten the window screen to the plastic, which does look pretty spiffy. I honestly prefer the gorilla tape method for its simplicity and how light the cover ends up being. It isn’t as pretty but it is so ridiculously simple. If you wanted something a little sturdier, you can easily construct a lightweight wooden frame just larger than the dimensions of the top of the brooder box and cover it with chicken wire. For my indoor setup, window screen is perfectly sufficient.

The Heat Source

This is where brooder setups can become a little controversial, and for good reason. It can also become way overcomplicated, in my opinion. Basically there are two methods of heating the brooder. Either a heat lamp (the old fashioned way), or a brooder heat place, similar to this one by the brand RentACoop or this one by Brinsea Products. Both are effective, but the controversy is over fire safety. There is always a risk of fire when using heat lamps, but there is a substantial price-point difference, so make your best judgement. Plenty of people still use heat lamps. The fire risk does make me a little nervous, though, and I would like to try heat plates at some point.

A brooder plate is a radiant heat-emitting panel that is height-adjustable for your growing chicks. Pretty simple and self-explanatory. Don’t opt for a cheap one, since the reviews are pretty telling, with plates either getting too hot (and ironically being a fire hazard) or not providing enough heat.

If you go with a heat lamp, you need some way to suspend the light above the brooder. I prefer it to hang straight down as opposed to pointing in at an angle, and make use of one of my many camera tripods, sometimes getting away with one heat lamp for both brooders, centering the tripod over the two boxes. Figure out what works for you. With it hanging straight down, there is plenty of heat right under the lamp, but there is room for the chicks to spread out into cooler parts of the brooder as well.

Get a cheap thermometer to monitor the temp, at least until you have a good idea of what sort of heat your chosen heating method is putting out. People can get really specific about the optimal temps for chicks, with charts related to how warm they need to be for each of the first 8 weeks of their lives and how to lower the temp so much each week, etc. Chicks do need it warm – in that 90-95 degree for the first week. But they’re also pretty resilient little things. I have had it well over 100 degrees (probably closer to 115) directly under the heat lamp and they find the spot in the brooder where they are most comfortable. If the entire brooder is too hot or too cold, make adjustments. Too cold? Lower the heat lamp. Too hot? Raise it up. Pretty simple. Depending on how cool it is in your house, you may find it handy to add a second heat lamp for a few days just to keep that temperature high enough.

Heat lamp bulbs can either be red or clear, and make sure they are splatter resistant for safety purposes. The red bulb is supposed to not mess with the chicks’ natural cycle and make them less prone to picking at each other.

So that’s my simple brooder setup! Not much to it. I’ll talk bedding, feeders, waterers, and other chick keeping tips in future articles.

Leave pictures of your DIY and frugal chick keeping setups in the comments for others to see! Happy chick days!

I Become a Chicken Farmer

My first week as a chicken farmer is successfully in the books! This is a brand-new little venture for me, and I’m excited to learn and see how it goes. I’ll be sharing lessons learned, tips, and tricks, so follow along and learn from my mistakes and successes!

I decided, with my man’s go-ahead, to order chicks back in January, not wanting to count on the availability of feedstore chicks this spring. The timing was very intentional: Get them in mid-April, they’d be pretty well-grown by our wedding, and we’d have eggs by the fall. Chicks were ordered in January, and within a week I had the bulk of my chick supplies purchased! Eagerly anticipating that order getting here this week, I got a little excited last week and went to Runnings for a few last-minute chick supplies (my chick order was set to ship the week at the beginning of this week). Yep, I came home with four chicks, two Prairie Bluebell chicks and two Sapphire Splash chicks. Oh my goodness. I’m not sure how many hours I spent watching those four chicks.

It was actually nice to get a few days’ headstart to finetune my brooder setup, and gave me a chance to think of a few other things that I wanted to have on-hand for when the big order arrived. So when Tuesday evening rolled around and I got an email saying my McMurray chick order was on its way, I was thrilled! I gave the post office a head’s up on Wednesday, and Thursday morning got a call that the chicks were in. Oh my goodness (favorite phrase when dealing with baby animals). The sounds coming from that little box on the drive back home were precious. And this is what I found when I got home:

I had ordered fifteen chicks: two Black Australorps, five Black Stars, five Red Stars, and three Buff Orpingtons. I was looking for breeds that were good layers, docile, could free range well, and were cold/heat hardy. Boy, they pack those little things in, and even threw in a tiny little silkie bantam as a freebie. I later told my man that I really expected to be productive Thursday morning, but sat on the floor for a full three hours, just watching the chicks. Oh, well.

One by one, I took them out, checked them for pasty butt, and made sure they found the waterer in the brooder box. Only a couple needed to be cleaned up, and one was the tiny little silkie bantam chick. He had a pretty pasted up rear end and seemed to have a minor vent prolapse, but is actually doing really well. He indisputably looks better now than he did when they arrived. I’ll write a little more about that later. As soon as they tasted the water and found the food, those little rascals came alive! They were constant motion for a couple of hours, some of them pretty scrappy, and gorging themselves on food, occasionally almost falling asleep in the water, at which point they had their fill and settled down. There hasn’t been any further picking or scrapping.

So far, I have nothing but good things to say about McMurray Hatchery and would definitely order from them again. The Runnings chicks have done well overall, except for one which died more or less without warning after about 3 days, and for no apparent reason. The other three are completely healthy and I’ve had no issues with them. Every couple of days, the older three get vitamins/electrolytes and prebiotics/probiotics in their water (the new chicks have that constantly, as well as sugar in their water), and I’ve ground their feed down a little bit as well, since they waste a lot of it picking past the big pieces. They’re absolutely hilarious to watch, and they’ve tamed down a lot and are pretty friendly, especially the older three.

The Runnings chicks initially needed regular attention to prevent pasty butt, which stopped being an issue after a few days, while the mailorder chicks have barely needed attention at all, other than the silkie. Considering pasty butt is made worse by stress, those feedstore chicks are definitely more stressed than mail ordered chicks. First, they get shipped in the mail, just like mail ordered chicks, and then they sit in bins at the feedstore until they are purchased, at which point they’re transported again. That’s a lot for a little critter to go through! I’m definitely impressed with how well the McMurray chicks have done and how healthy they seem overall.

So right now I have 19 chicks in my livingroom, peeping up a storm, and couldn’t be happier. My dad jokingly called it a fulfillment of a lifelong dream, and he really is rather correct. Stay tuned for more chick adventures!