In the Coop | Treating Coccidiosis

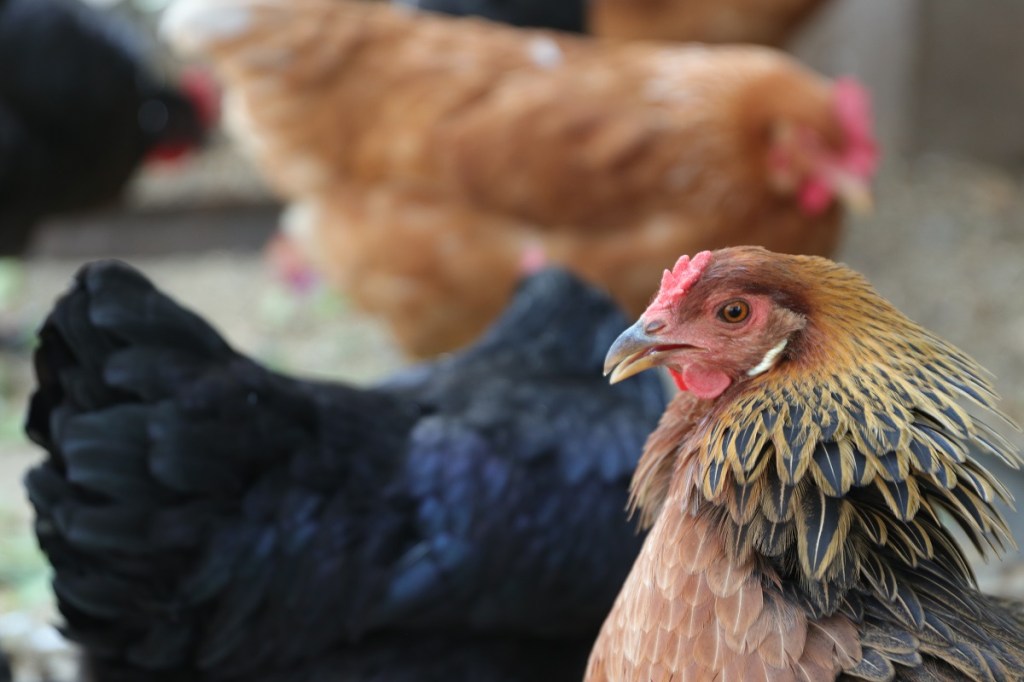
Although some people probably manage to get through their chicken keeping career without dealing with a coccidiosis outbreak, this is a really common flock sickness caused by a common parasite and it definitely pays to be able to recognize the symptoms before your entire flock is infected!

Before getting started on this article, I want to add a healthy disclaimer here: I am not a vet. All I want to do is share a little about coccidiosis and how I successfully treated it, and why I think it worked.

So, what is coccidiosis?

Coccidiosis is a relatively common infection that can affect all manner of livestock and wild animals, caused by a single-cell parasite in the GI tract. This parasite lives in the soil and is actively spread by wild animals. Symptoms in chickens include lethargy, not eating or drinking, watery/mucousy stools, and bloody stools.

Treating or preventing an outbreak

If you discover a case of coccidiosis in one chick or chicken, you need to treat the entire flock, regardless of symptoms. Treatment is super simple but it takes some time. Using liquid Corid (sold at feedstores and online), for 5-7 days, add 1 teaspoon of Corid to 1 gallon of water (for a moderate outbreak) OR 2 teaspoons of Corid to 1 gallon of water (for a severe outbreak). After the 5-7 day initial treatment, follow with another 5-7 days of 1/2 teaspoon per gallon of water. Don’t give any other water except this Corid-medicated water, and make it fresh daily.

Treating the Sick Bird

This part is important: if you have a single chick (or chicken) that is showing symptoms of acute coccidiosis, and is displaying the tell-tale lethargy, watery droppings, and not eating, the flock treatment method will not work by itself. By the time you notice your chick not eating and drinking, it is fruitless to add Corid to their water and expect any sort of improvement. They’re not eating or drinking so any medication administered free-choice isn’t going to be consumed.

Let’s be specific here: It is the dehydration and malnutrition caused by not eating and drinking that will kill the chick, not the parasite itself. So don’t just put Corid in the water and call it good. The chick needs nutrients and rehydration as well.

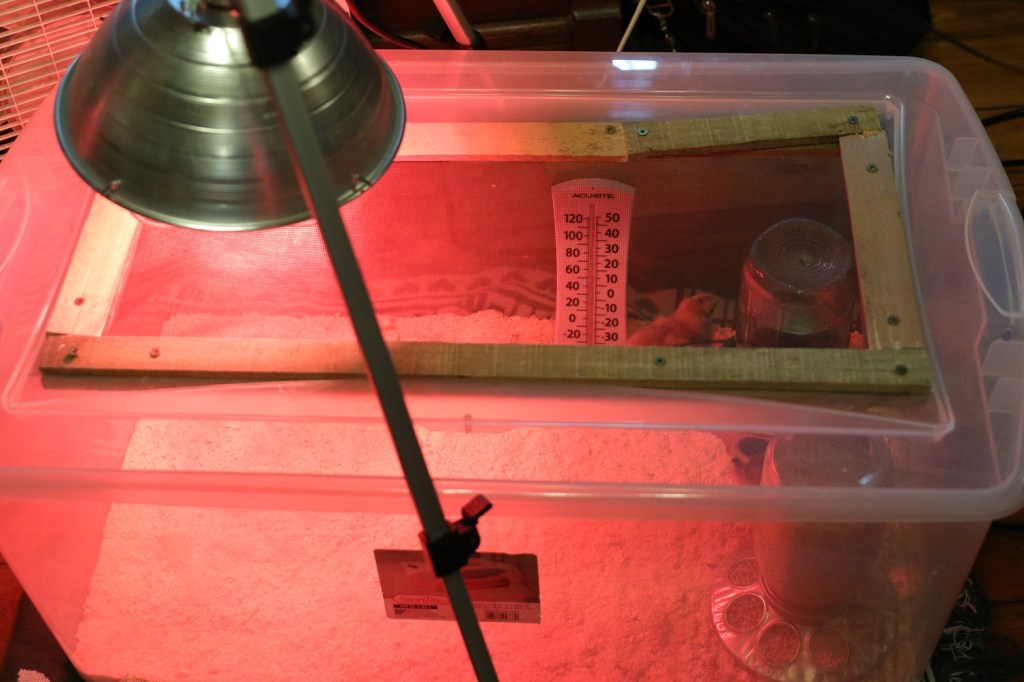
Late this past summer, I had a chick suddenly get sick with all the classic coccidiosis symptoms. I isolated the chick and took a common-sense approach to treatment. My thought process was that the chick needed rehydration and needed the medication, which it wasn’t getting from free-choice water. The sick chick got dropper feedings multiple times per day of a slurry of egg yolk, yogurt, molasses, sometimes thinned with Corid medicated water (using the dosage listed above), sometimes with a few drops of Nutri-drench, and was also given medicated water by dropper as well. The first couple of days I gave her a concentrated dose of Corid by syringe. I would draw up probably a quarter of a cc of Corid into a syringe, draw up a cc or so of water, and administer that to the sick chick. I don’t have a digital scale and Corid, by my understanding, is a pretty safe medication. The chick was in bad enough shape I was willing to risk overdoing it to get enough medication actually in her. My goal was something like 5 or 6 cc’s of this medicated slurry and fluids per day, kind of whatever I could get in her without too much trouble. Based on the size of the chick you’re treating, it might be more or less than this. Use common sense. Any amount is better than the chick sitting in the brooder and not eating anything.

Don’t take my word as expert by any means, but sometimes you have to think a little outside the box – in this case, it worked really well. Obviously treating a chick or chicken individually takes a time commitment (honestly, just a few minutes a few times per day), but if you’re wanting to try to save a coccidiosis-infected bird, that’s what it will take.

I’d love to hear any other tips or advice on treating coccidiosis! It is a pretty common infection but sometimes the information can be pretty confusing on how to treat it. Happy chicken keeping!

In the Coop | 5 Things to Have on Hand

If you’re a first-time chick keeper, you can find lists (and lists and lists) of recommendations online about what you absolutely need to have on hand for that first order of chicks. I don’t know about you, but that can feel a little daunting.

The five things I absolutely would have on hand are: Save-a-Chick probiotics and electrolytes, Nutridrench, Corid, and a 3cc syringe. With those things on hand, you can combat a lot of what might kill your chicks in the first few weeks of their lives.

Probiotics and Electrolytes. Add probiotics and electrolytes to their water for a little boost, to replenish and balance their electrolytes, and as preventative. When you first get your chicks, either mailorder or from a feed store, they will need a little pick-me-up. The mailorder chicks haven’t eaten or drunk anything since being out of the egg and will be ravenous and a little dehydrated. The feedstore chicks likely just got dumped in a sale bin with little attention given, so they could also use some TLC. The probiotics are a good idea because GI issues can quickly become fatal in baby chicks, since they are so small any dehydration is going to have a significant impact. Make sure you are changing this every day, if not multiple times, since it will grow stuff, especially with the heat lamp going! I mix up a pitcher of this and keep it in the fridge, and would give it to my chicks for a couple of days, then give them plain water.

Nutridrench. This is a kind of a first-line treatment to give to just about any chick that looks like it needs a little boost. It is a mix of vitamins, minerals, electrolytes, and sugar. I’ve only ever given this to sick chicks and mixed it in a slurry of egg yolk and/or molasses and/or yogurt.

Corid. This is the brand name for the medication amprolium. You could have chickens for years and never deal with coccidiosis, I would imagine, but this is something to keep on hand. As far as I know, Corid doesn’t really go bad and I would much rather have it on hand and not need it, than have coccidiosis run rampant through my flock, chicks or chickens. I will do another post on treating chicks with coccidiosis at a future date, but trust me on this one and keep it on hand! Don’t wait until you figure out that’s what’s making your chicks sick and then have to go find it or worse, order it online and wait for it to arrive. In a pinch, feed stores do carry it, but I just wouldn’t want to risk it being out of stock when I wanted it. It is pricey, but a little goes a long way.

3cc syringe. This is the easiest way to administer nutritional first aid or a medication like Corid to your chicks. It takes a little bit to figure out how to hold the chick and how to get her to open her little beak to take the syringe. I find that the easiest way is to cup the chick with my nondominant hand and press her back against my chest. Do not stick the syringe down her throat or into the center of her mouth, but instead press the tip of the syringe into the very corner of her beak until she opens up, and she will, even if just for a split second. It might take a few tries before you manage to slip the syringe just into the corner, and then kind of pull gently to the side to make the syringe sit securely in the pliable fold of the corner of her beak. Now you can administer the liquid, and it can be done pretty quickly if the syringe is placed correctly. Just don’t administer too much at once and choke the chick. If you have to doctor a chick for awhile, the corner of her beak is going to get a little red and irritated, but honestly that will make her more likely to open her beak.

This is hardly an exhaustive list, especially if you’ve done other reading and have seen the many, many things people will recommend to keep on hand for chicks. There is VetRx for respiratory issues, anti-pecking sprays and gels, wound care, and more. But what I listed above is what I would not choose to be without!

Please drop a comment below with your recommendations on those absolute must-haves for chick keeping! Happy chick days!

In the Coop | What Breeds?

If you’re just getting started with your chicken keeping endeavors, it can be daunting to know where to start when it comes to breeds of chickens. There are a TON of different ones. How in the world do you pick?

Before we jump into the different breeds and classifications, ask yourself what your goal is with your chicken keeping. How many birds do you want? And why do you want them? Some people want the biggest bang for their buck with the highest producing layers intending to sell eggs. Some just want enough for eggs for their family. Others are into the showier, fancy breeds for the novelty factor, and aren’t as concerned about high egg production. Some are chasing that “rainbow dozen” and want a colorful egg basket each day. Whatever your interest, whatever your goal, there’s a way to do it!

Goal: Egg Production

If you goal at the end of the day is high production, then you want to look at “production breeds.” Examples of these are the sex-link, hybrids developed to have different colored chick plumage for pullets and roosters, making them identifiable as soon as they hatch. Different hatcheries sometimes come up with their own sex-link hybrids, but some common ones are ISA Brown, Red Star, Amber Star, Amberlink, and Black Sex Link. These are the BEST of the egg-layers, able to produce upwards of 300 large eggs per year, which is insanely impressive. Another favorite of the production breeds is the White Leghorn, which lays white eggs, also in the upwards of 300 eggs per year range. There are also many heritage breeds that are good layers, but oftentimes they are heavier birds requiring more feed, so that can drive up the cost of egg production. They, however, may have more longevity in their laying career.

Goal: The Rainbow Dozen

Who doesn’t love the look of a beautiful, colorful egg basket? Shades of rosy brown and light tan, dark brown, blue, sage green, all make for a beautiful presentation. If you’re not sure where to look for some of the unique colors, here are some suggestions. Ameraucanas will give you beautiful light blue or green eggs, and will lay lots of them. Cream Crested Legbars are another blue-laying variety. “Easter Eggers” will lay just about any colored egg. Americanas (notice the spelling difference) are a hybrid and not a true breed, and are essentially an Easter Egger that isn’t an Easter Egger (which also is a hybrid and not a true breed). There is a lot of ambiguity surrounding the Ameraucana/Americana/Easter Egger conversation! The hybridization is pretty extensive as breeders have developed hybrids for consistent shell colors. Hoover Hatchery’s Prairie Bluebell Egger is bred for blue eggs, while their Starlight Green Egger is bred for green eggs. You’ll hear other names like Olive Egger, Cherry Egger, etc. If you want those super dark, chocolate-brown eggs, look for Marans (any variety) and Welsummers. Red Stars also lay a rich brown egg, not as dark as Marans, but they are the darkest in my egg basket! Buff Orpingtons give a nice peachy tan egg.

Goal: Eggs and Meat

Some birds are considered dual purpose, and can be raised for egg production as well as meat. Examples of these dual purpose breeds are Buff Orpingtons, Sussex, New Hamshires, Partridge Rocks, and Wyandottes. These will be good layers as well as big enough to raise for meat. They’re heavier birds, so they will require more food.

Goal: Meat

If you aren’t looking to get eggs but instead want breeds for butchering, you’ll be looking at the broiler varieties. Keep in mind that these birds are time-sensitive. Some of them are bred so that they are ready to butcher in as little as a few months, and their quality of life significantly decreases when they get past that point, as their bodies get too big for their legs and they lose the ability to move. These would be your “broiler” and “roaster” varieties, such as the Delaware Broiler, Ginger Broiler, etc.

Goal: Funny Pets that Lay Eggs

Maybe you really want to build a flock of sweet, friendly birds that will be more or less pets. Some breeds have better dispositions than others. Others are flightier. The friendliest chickens I have had are Buff Orpingtons (basically the golden retriever of the chicken world), Red Stars, and Ameraucanas. I had one Prairie Bluebell hen and she was excellent. Or maybe you would like the novelty of the Polish chickens, also known as the “dance hall girls,” or the adorable frizzle and silky bantam breeds.

Goal: Breeding

If you hope to eventually hatch your own chicks and want to have at least a vague idea of what you’ll get, you might want to steer towards heritage breeds and away from hybrids. Hybrid chickens do not breed true, meaning even if you bred, for instance, a Red Star cockerel with a Red Star hen you wouldn’t get a Red Star chick. Obviously, if you don’t isolate breeds, you’ll end up with hybrids, but if you breed with heritage breeds, theoretically you’ll know what your hybrids are! If you just want the experience of hatching chicks and don’t care how hybridized your “barnyard mix” is, anything goes! Examples of heritage breeds are Buff Orpington, Black Australorp, Brahma, Wyandotte, and many others. If you want to try to breed for shell color in pullets, there are plenty of resources online for knowing what roosters to breed with what hens. For instance, a blue-egg rooster (such as an Ameraucana) bred with a brown-egg hen (such as a Maran) will give you birds with the green-egg-laying gene.

Finally, a reputable breeder will have breed characteristics listed for each chicken, including heat and cold tolerance, ability to free-range well, likeliness to be broody, and temperament in general, as well as a lot more details about the breed.

So these are just some things to consider if you’re wanting to get into chicken raising and don’t know how to pick a breed or where to start!

What are your favorite chicken breeds? Leave a picture in the comments!

.

In the Coop | Simple Brooder Setup

It is that time of year, when you walk into a feed store and hear the telltale cheeping from those bins of day-old chicks. Happy days for those of us happy chicken keepers! That also means spring is coming, which means everyone should be happy when they hear chicks cheeping!

As people are getting into the mode of chick season, I wanted to share a simple DIY brooder box setup that I have found to work really well. It is easy to maintain, easy to clean and access, and is cheap, which is a plus. There is a lot of info out there and a lot of ways to overcomplicate a brooder box setup or make it more expensive than it needs to be. I wanted to give my nuts-and-bolts, budget-conscious setup.

Let’s break it down!

The Box

The simplest form of a brooder box is just a container and a heat source. That’s all you need! No fancy galvanized steel bin or brooder panels are necessary, but of course you can go that route if you so choose. The main requirement is that the box have solid sides, to retain heat. The number of chicks will dictate the amount of space needed, obviously. A large Rubbermaid bin, the 66 quart kind with a locking lid that you can get at Walmart for $10, works really well. I have two bins, and have found that each one can comfortably house about 10 chicks for roughly two weeks. As the chicks grow they’ll quickly outgrow whatever setup you have! The taller the bin, the longer it will take for them to escape.

Even if you are starting with just a few chicks, I’d recommend having two brooder boxes. If you end up with a sick chick or one is getting picked on, or the chicks just plain old take up more space than you expected, then you have a fallback. When I got my August chicks from McMurray Hatchery, I had one chick that needed a little extra care and was glad to be able to almost immediately divide my chicks into two groups so the smaller ones didn’t get pushed around.

The Cover

The cover needs to allow good circulation of heat and humidity in and out of the brooder. For the first few days, a cover is really only needed to keep curious critters out of the brooder box, but after a week tops, the chicks will be actively looking for escape. For a super simple cover, just cut a large opening in the plastic lid with a reciprocating saw and cover with window screen, tacking the edges down with gorilla tape. We made one cover this way, and another using lath and screws to fasten the window screen to the plastic, which does look pretty spiffy. I honestly prefer the gorilla tape method for its simplicity and how light the cover ends up being. It isn’t as pretty but it is so ridiculously simple. If you wanted something a little sturdier, you can easily construct a lightweight wooden frame just larger than the dimensions of the top of the brooder box and cover it with chicken wire. For my indoor setup, window screen is perfectly sufficient.

The Heat Source

This is where brooder setups can become a little controversial, and for good reason. It can also become way overcomplicated, in my opinion. Basically there are two methods of heating the brooder. Either a heat lamp (the old fashioned way), or a brooder heat place, similar to this one by the brand RentACoop or this one by Brinsea Products. Both are effective, but the controversy is over fire safety. There is always a risk of fire when using heat lamps, but there is a substantial price-point difference, so make your best judgement. Plenty of people still use heat lamps. The fire risk does make me a little nervous, though, and I would like to try heat plates at some point.

A brooder plate is a radiant heat-emitting panel that is height-adjustable for your growing chicks. Pretty simple and self-explanatory. Don’t opt for a cheap one, since the reviews are pretty telling, with plates either getting too hot (and ironically being a fire hazard) or not providing enough heat.

If you go with a heat lamp, you need some way to suspend the light above the brooder. I prefer it to hang straight down as opposed to pointing in at an angle, and make use of one of my many camera tripods, sometimes getting away with one heat lamp for both brooders, centering the tripod over the two boxes. Figure out what works for you. With it hanging straight down, there is plenty of heat right under the lamp, but there is room for the chicks to spread out into cooler parts of the brooder as well.

Get a cheap thermometer to monitor the temp, at least until you have a good idea of what sort of heat your chosen heating method is putting out. People can get really specific about the optimal temps for chicks, with charts related to how warm they need to be for each of the first 8 weeks of their lives and how to lower the temp so much each week, etc. Chicks do need it warm – in that 90-95 degree for the first week. But they’re also pretty resilient little things. I have had it well over 100 degrees (probably closer to 115) directly under the heat lamp and they find the spot in the brooder where they are most comfortable. If the entire brooder is too hot or too cold, make adjustments. Too cold? Lower the heat lamp. Too hot? Raise it up. Pretty simple. Depending on how cool it is in your house, you may find it handy to add a second heat lamp for a few days just to keep that temperature high enough.

Heat lamp bulbs can either be red or clear, and make sure they are splatter resistant for safety purposes. The red bulb is supposed to not mess with the chicks’ natural cycle and make them less prone to picking at each other.

So that’s my simple brooder setup! Not much to it. I’ll talk bedding, feeders, waterers, and other chick keeping tips in future articles.

Leave pictures of your DIY and frugal chick keeping setups in the comments for others to see! Happy chick days!

When Winter and Spring Collide

What a time of year in what a wonderful part of the country. I know a lot of people in a lot of places say this, but truly, if you don’t like the weather around here, just wait a week. Or a few hours. It’ll change.

We’re halfway through February, and we’ve enjoyed some seasonal weather, chilly but not brutal, intermingled with days so warm you can smell the sap in the trees and the warming soil. There’s an extra something in the air. The promise of coming spring. But right now we’re watching for the winter storm that’s forecasted to start tomorrow.

A snow squall this morning was followed by blue sky this afternoon, teasing us with what’s forecasted, while we pray and hope for some of the moisture we so desperately need. While the meteorologists woefully and apologetically predict snow, ranchers are welcoming it for the moisture but prepping for what could turn into a challenging week. Once again we’re battening down, with forecasts of up to 18 inches of snow, heavy winds, and frigid temperatures. The three surprise calves that were born last month really were fortunate, and are healthy and strong going into this cold.

And what a teasing, taunting, beautiful winter it has been. It is as if winter and spring keep bumping into one another. One day I’m getting into my garden, stripped down to a tank top, the next I’m bundled up in heavy bibs stumbling around trying to keep animals watered and fed. One day Brad and I are splitting wood in a balmy 50-feels-like-60 degrees, the next we’re watching snow flurries and breaking ice on all the water. One day my laundry is hanging on the line to dry, the next I think I’m wearing everything in my closet. One day the chickens are happily free ranging in the springlike temps, the next day they glare at me as I let in a blast of cold air opening their door.

The one thing that is a constant is the pups – Snow or shine, they love it outside! I love looking out and seeing them romp, or finding a pile of kittens and puppies on the deck soaking up the sunshine. Josie got to experience her first few times riding the ATV, and she and Bess have come with us on some of our project afternoons.

The warm days we’ve filled with as much outdoor work as possible, reveling in the winter warmup – In Brad’s free time he has felled and chunked a number of dead trees, as well as pulling useable firewood out of the machine piles from when some logging was done several years ago. We hauled the splitter and a dump trailer up the hill to one of the piles and filled it full, and it turned into something of a late Christmas present for the folks. There’s nothing like wood heat on a cold day! And the girls were great help.

We’ve done some odds and ends of wintertime and spring-prep cow work, bringing the first calf heifers into the hayfield so they can be checked easier when they start calving. Brad is getting the calving shed set up and we’re just hoping the heifers wait until after this snow storm to start! We’ll be moving the rest of the cow herd tomorrow, bringing them from the north of the ranch into the center of the ranch for calving.

I’ve gotten into my garden, cleaning it up and adding compost, turning it under, wetting it down, and getting it ready for spring planting. So exciting! Every few weeks when there has been a warm up, I’ve watered the trees we planted, including the oak and ash sapling transplants, and have also doused my perennial garden a few times. Green is already starting to show! I bent a couple of twigs and even the transplants have survived. When I was churning up my vegetable garden, I uprooted this strange mess of roots, so fine I first thought it was fungus, only to realize it was my chives. Oops. Fortunately some plants are pretty forgiving.

The chickens are really picking up their egg laying, with a record breaking 17 eggs yesterday, and 16 the two previous days! I love being able to meet my customer demands, and sold three 18-packs and two 12-packs this weekend, and five 18-packs at the beginning of last week. I’ve been getting my plan in place for purchasing chicks soon, which is extremely fun to anticipate.

On the cold days I’ve baked bread and sourdough muffins, gotten some writing done, canned the rest of my cranberries, brainstormed chickens and chicks, planned my garden, and cleaned, cleaned, cleaned, the result of puppies and mud and the blurry line between winter and spring.

I went through all my seeds today and am pretty well set for my garden, except for one or two more varieties of tomatoes and some pumpkins. I’ll be getting some greens started in the house soon, a little indoor “salad garden,” since I’m hankering to be growing something. Maybe it will become a permanent off-season thing. To my rancher husband’s chagrin, I eat a lot of lettuce and greens. He says I’ll eat him out of business.

What beautiful days these are, when winter and spring collide.

Back in Business

As of today, I am back in the blue egg business! One of my Ameraucanas, which I actually was concerned was a rooster, left me this beautiful blue egg.

There’s just something about a colorful egg basket. And now I know my young flock is starting to lay!