This delicious sourdough biscuit recipe is shared from the book Bacon and Beans: Ranch-Country Recipes, a Western Horseman book by Stella Hughes, published in 1990. It is a pretty foolproof recipe, comes together quickly, and with the addition of some baking soda you are just about guaranteed some fluffy biscuits!
Ingredients:
1/2 c. sourdough starter 1 c. milk 2 1/2 c. flour 3/4 tsp. salt 1 tbs. sugar 1 tsp. baking powder 1/2 tsp. baking soda bacon grease or butter, melted
To Make:
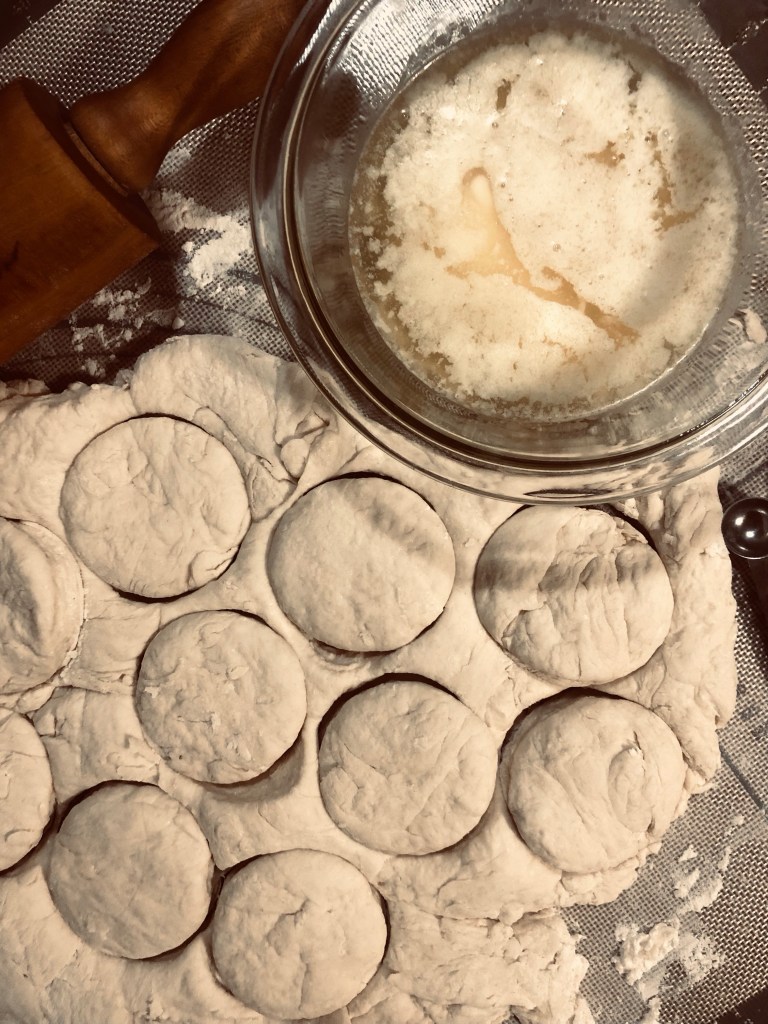
Mix starter, milk, and 1 cup of flour in a large bowl and let sit for 8 hours or overnight. Cover with a towel and keep in a warm place. When ready to use, turn sourdough batter out onto clean surface with 1 cup of flour. Sprinkle salt, sugar, baking powder, and baking soda over the top of the batter, followed by the remaining 1/2 cup of flour. With hands or a spatula, mix dry ingredients into dough, kneading lightly. Handle as little as possible! Roll out approximately 1 inch thick and cut with biscuit cutter. Dip in melted bacon grease or butter, and place in a baking pan. Let them touch, but don’t overcrowd. Let rise in a warm place for about a half hour, and bake at 375 degrees for 30 minutes or until they are golden brown. Makes about a dozen biscuits.
Notes:
Handle the dough as little as possible to keep biscuits from getting tough. It can be difficult to get all the flour incorporated–Don’t worry about it! Instead of kneading, I try to stretch and fold to incorporate the dry ingredients into the dough, but don’t try to get the dry ingredients all moistened or evenly smooth, or you will over-knead and have tough biscuits.
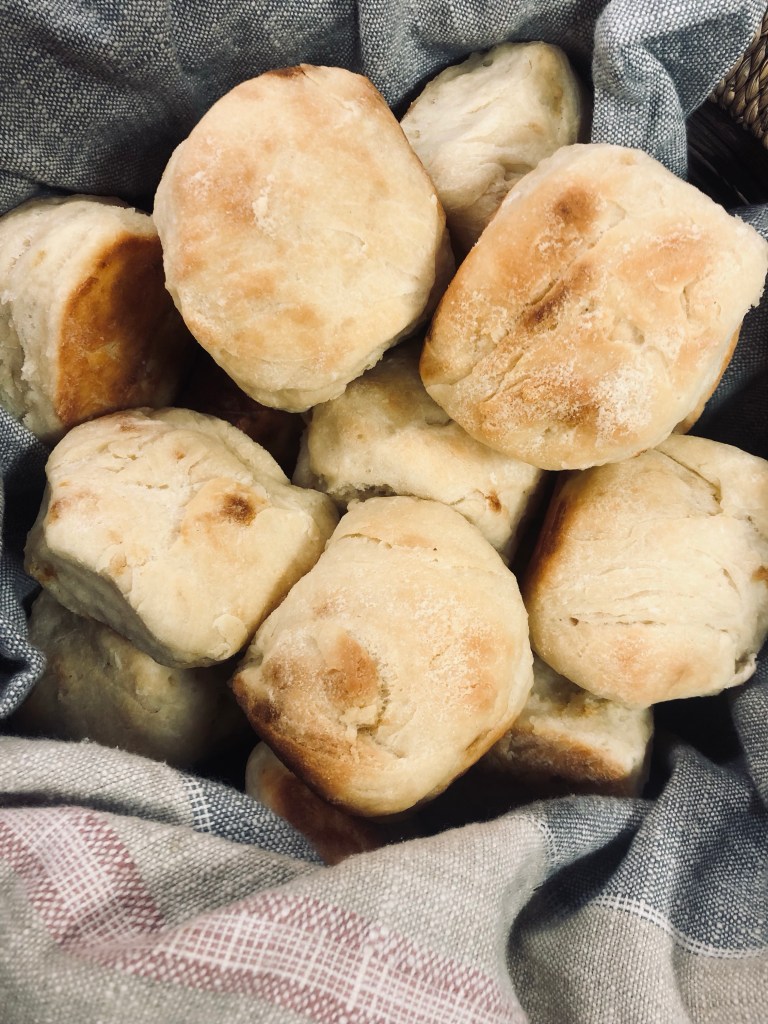
I find that a single batch fills a 9×9 baking pan, with a couple biscuits leftover, which I tend to cook in a separate smaller dish. Depending on how thick they are cut, obviously, you could stretch the yield on this recipe. There is a considerable amount of oven spring with this biscuits–they will puff up in the oven! They are served best fresh out of the oven, and I love to serve these with homemade butter and homemade jam! They’re always a hit.
Enjoy!
Support Song Dog Journal and share to social media!
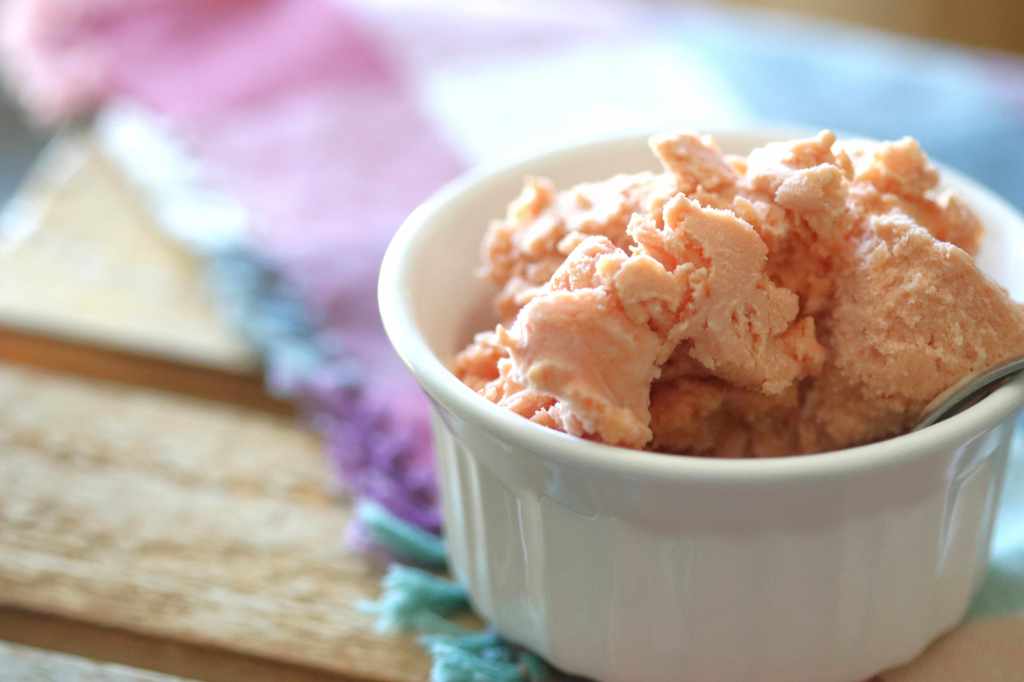
Nothing says summer better than a bowl of the best, creamiest homemade ice cream! Usually I make peach ice cream, but I decided to use some of the plum pie filling I had canned this past fall, and the result was fantastic.
We were gifted a Cuisinart ice cream maker for our wedding, one of those random gifts that took us completely by surprise, and we have loved it! It is extremely simple to use, and the recipes are easy to modify. The mixing bowl just lives in our freezer to be used whenever desired, or it takes about 24 hours for the bowl to freeze before use, the recipes mix up in about 5 minutes and chill in the fridge for a few hours, and the ice cream itself is made in about a half an hour of mixing and freezing. Basically, it is just an easy and fun way to serve up desert for a group, without heating the house up on a hot day! This recipe is based off a Cuisinart recipe.
Ingredients:
1 1/2 cups plums or fruit from plum pie filling, pureed or chopped
3/4 cup whole milk (or half-and-half)
1/3 cup sugar
pinch of salt
1 1/2 cups heavy cream
A generous splash of vanilla
Directions:
Combine milk or half-and-half, sugar, and salt in a bowl and whisk until the sugar is dissolved. Puree the fruit in a blender, and add to the bowl, along with the cream and vanilla. Stir well, and refrigerated for at least two hours.
When chilled, pour into ice cream maker mixing bowl and follow manufacturer instructions.
Serve immediately when desired consistency is reached, or freeze for a harder ice cream.
Notes:
I mostly used the fruit from the canned pie filling, leaving the syrup behind, which happens to make excellent ice cream topping…Since there is sugar in the pie filling, and because I like things less sweet anyway, I cut the sugar back to 1/3 of a cup instead the 2/3 of a cup the original recipe calls for. If you use fresh plums, you might want to use the full amount of sugar. My original recipe also calls for whole milk, but I like using half-and-half instead, or at least adding some half-and-half to the whole milk for some extra creaminess (if I’m going to indulge in dessert, it might as well be extra creamy and extra good!).
Enjoy!
Support Song Dog Journal and share to social media!
Over the past several years, I have grown to enjoy home fermentation projects, from yogurt to sourdough, and of course kombucha. Kombucha is one of those weird, hippie-esque beverages originating in Asia somewhere a few thousand years ago that gets really, really mixed reviews. It is pretty simple, honestly, just a fermented sweet tea with or without the addition of fruit or fruit juice. It is touted for many health benefits, boasting healthy probiotics similar to yogurt or other naturally fermented foods and beverages. Good kombucha is pleasantly effervescent and has an appeal reminiscent of wine, if it is a lighter kombucha, or even beer, if it is a stouter one. As a product of fermentation, there is alcohol in it, but very little. I specify “good kombucha,” because some of what you can purchase at stores has strange things added to it or has fermented too long and has turned vinegary, both of which can affect how palatable it might be.
I am far from being an expert on making kombucha. If you want expert advice, I suggest any number of books that exist on the subject, or websites or Facebook groups dedicated to “home brewing.” I have a very simple recipe that a friend gave my sister several years ago, and I’ve just tweaked it here and there to suit my preferences. All I’m sharing is a recipe and method that I have found to work reliably.
To make your own kombucha, you need the following:
A half gallon jar
A scoby (what? See below)
2 cups of mature kombucha
4 cups of brewed green tea (with 1/2 cup sugar dissolved)
First fermentation:
Brew tea, either green or black or a combination, though my preference is green tea – I like to do 4 green tea bags in 4 cups of hot water, add the 1/2 cup sugar while it is hot, and let it cool before removing the tea bags. This will take a few hours, so plan accordingly.
Place your scoby and the 2 cups of mature kombucha in your brewing jar, and gently pour the cooled sweet tea in with the scoby. The scoby may or may not float, which doesn’t matter. It will form a new layer on the top of the tea, regardless. Cover the jar with a coffee filter (or square of muslin or paper towel), secure with a rubber band, and place in a warmish location. And wait.
Depending on how warm your house is, your kombucha might brew as quickly as 1 week, or might take closer to two. If you’re doing this in the summer and your house is very warm, it might be done even quicker than a week! Taste it after five days or a week and see how the flavor is. If it is lightly carbonated and not too sweet, then proceed to the second fermentation (described below). If it is pretty flat and very sweet, let it sit another few days. Err on the side of checking too soon, since once it has gone to vinegar it isn’t very salvageable, except to save 2 cups back for a new batch.
Second fermentation:
If you like the taste of the kombucha after the first fermentation, you sure don’t need to proceed to a second! If you want a fizzier tea, proceed with the second fermentation.
Leaving 2 cups of kombucha and the scoby in the jar (to be used as the starter for a new batch just like above), pour off everything else into a smaller Mason jar or a bottle with a swing-top, such as these by the brand Otis. Add a half a cup or so of fruit juice (I use homemade cranberry juice), close the lid, and let it sit for two days or so. This is called the second fermentation. The remaining sugar or any added sugar from juice or fruit added at this phase feeds the scoby and the fermentation continues, but with the sealed lid, the carbon dioxide formed during fermentation is contained resulting in natural carbonation. This part of the process is probably the least predictable and takes some trial and error, and honestly I rarely get the perfect second fermentation. Too long of a first fermentation and not enough sugar remaining (and not enough added for the second ferment) and there isn’t enough sugar to get the carbonation. The temperature in your house will affect this as well, with how quickly the fermentations take place. If you get a good first fermentation, though, the kombucha is still delicious.
After a few days, taste the bottled kombucha and see if it is to your liking! If it is, congratulations! Keep in the fridge to prevent it over-fermenting and getting vinegary. It will continue to ferment a little in the fridge.
If it isn’t quite to your liking, seal it up for another few days, or even add a little more fruit juice for some sugar. Depending on how good the lids are on the jars or bottles you’re using, you might want to crack the lid after a couple of days to prevent the pressure from building with the carbonation and exploding the jar. I have heard reports of this happening, though I haven’t had it happen to me…yet. Some people put their bottles in cardboard boxes, or you could also wrap the bottles if you’re concerned about them exploding.
A couple of notes:
What in the world is a scoby? Actually, “scoby” should be spelled “SCOBY,” since it is an acronym for Symbiotic Colony of Bacteria and Yeast. Basically, it is a bacteria and yeast mushroom that grows on the top of the brewing kombucha, and is what metabolizes the sugar to produce the fermentation that makes kombucha so nutritious and delicious. It is also called “the mother.” With each successive fermentation, the scoby will add a new layer on the top and eventually you’ll be able to separate or divide the layers into separate “mothers.” People who have been brewing kombucha forever often keep scobies in “scoby hotels,” for future use. This is the easiest way to obtain a scoby, from a person with extra to share – just be sure to get 2 cups of mature kombucha from them as well. There are places online where you can purchase scobies, or you can make your own, which I will explain in a future article. Scobies are perfectly safe to handle, with a weird rubbery texture, just handle them with good hand hygiene since they are a colony of bacteria and we want to keep the scoby clean of bad bacteria.
Black or green tea: Generally kombucha recipes call for black tea. I prefer green. Most store-bought kombucha is a mix of the two. Take your pick! I think the green has a lighter, more delicate taste.
The amount and kind of sugar: My original recipe called for 1 cup of sugar to 4 cups of tea. After trial and error, I found that less sugar produced a better kombucha and I’ve settled on 1/2 cup of sugar. I tried 1/3 of a cup, but the kombucha wasn’t as fizzy. I have heard of people using other kinds of sugar, even coconut sugar, but I just use plain white sugar. I found coconut sugar to have a weird aftertaste.
Juice or fruit: As I stated in the recipe, I use homemade cranberry juice for the second ferment. There is no added sugar in this juice, which I like, especially since I actually want the kombucha to be low in sugar at the end of the process. You can use any juice, though, and if your first fermentation is giving you a low-sweetness tea, maybe you’d want to use juice with more sugar, to give a little punch to the second fermentation. You can also add pieces of fruit during this phase.
Bottles or jars: For the second fermentation, you can use anything that can seal. Just make sure you use a quality bottle that can hold up to the possibility of a lot of pressure building up. The Otis brand swing-top bottles get great reviews on Amazon for kombucha brewing and are what I’m just starting to use. Swing top lids are nice just because you can always unseal them, even if the pressure builds up, unlike with Mason jar lids where the lid can become difficult to get off. There are plastic lids with rubber seals that are made specifically for fermentation.
So there you have it! Again, this isn’t my expert recipe. This is my simple recipe that I use for kombucha that I thoroughly enjoy drinking! Maybe you will, too! Happy brewing!
Support Song Dog Journal and share to social media!
Okay, so this barely qualifies as a recipe. It really doesn’t. But there isn’t another comparable word for a “handful of this, handful of that, shake it up” sort of concoction. But it has become one of our favorite quick snacks! Not to mention, this old coffee cannister is pretty nostalgic for me – It recalls years of memories of my grandparents and their delicious chocolate chip cookies, since this served as their cookie jar as far back as I can remember.
Anyway, Brad and I eat a lot of nut mixes and trail mixes. We come in from chores or cow work and just need a quick snack mid-morning, and a handful of something, oftentimes peanuts or cashews, generally does the trick. We had found a couple of really good trail mixes at Sam’s Club, but we ate enough of them that I finally decided I wanted to start just mixing our own trail mix. As silly or simple as this might sound, we enjoy the homemade version better than the store bought versions.
Pick from a variety of nuts, M&Ms or chocolate pieces, and dried fruit, add desired quantities and shake it all up! You can go sweet or savory, with seasoned or unseasoned nuts, roasted or raw, salted or not, and the list goes on. If you want to get a little fancier, you could toss your mix with a little olive oil and a seasoning of your choice, and bake briefly in the oven. The possibilities are endless.
This one is peanuts, almonds, M&Ms, and raisins. There were supposed to be cashews, but I think I accidentally ate them all before I got around to mixing this up. I made a second jar for myself without raisins. Brad pointed out that there were twice as many M&Ms in my jar as in his jar, but I pointed out that he got all the raisins. Fair’s fair.
Support Song Dog Journal and share to social media!
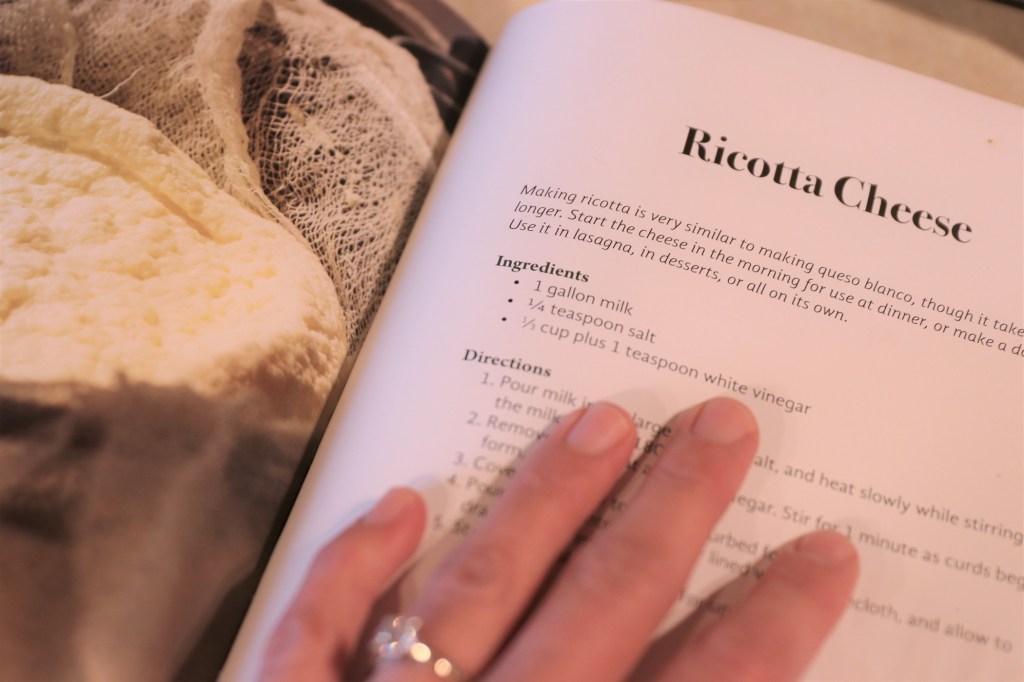
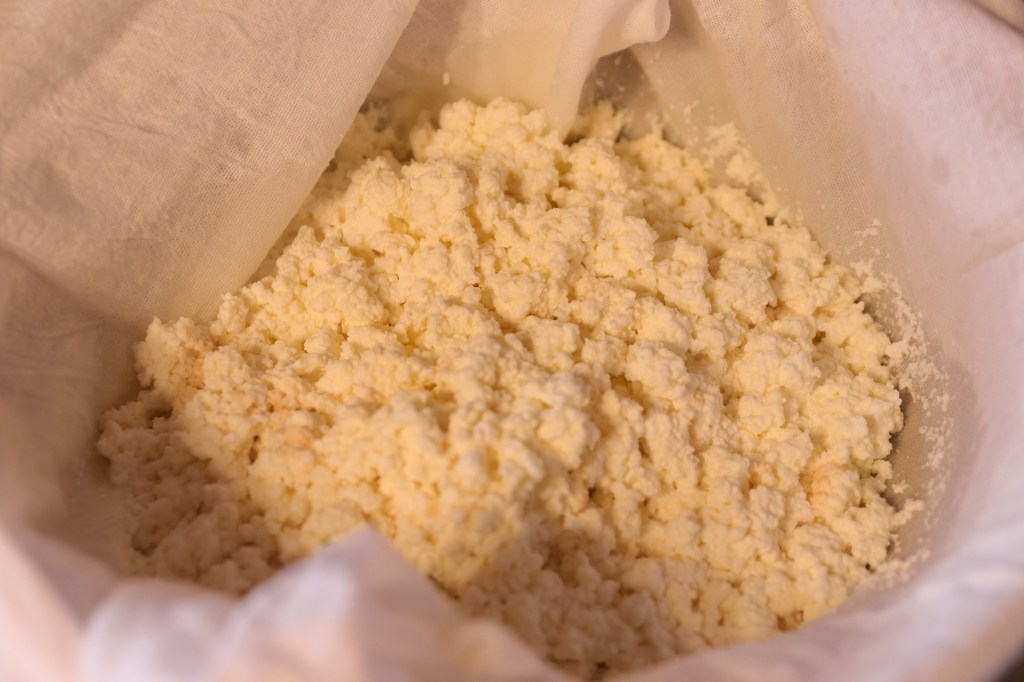
I was leafing through a book I picked up at a shop in Custer, titled The Essential Guide to Self-Sufficient Living, by Abigail Gehring. It is a beautifully curated little book, full of excellent, simple recipes and project ideas. Due to a positive Covid test yesterday, I’m now in quarantine with some time on my hands, so it was the perfect opportunity to try this easy recipe for ricotta cheese! Ricotta cheese is pretty pricey at the store, so I rarely buy it, but it is my favorite filling for crepes. Homemade crepes and ricotta cheese will be the perfect Christmas morning breakfast!
Ingredients:
1 gallon of milk 1/3 cup plus 1 tsp. white vinegar 1/4 tsp. salt
Directions:
In a large saucepan or stockpot, combine the milk and salt and heat it slowly to 180 degrees Fahrenheit. I used a candy thermometer to watch the temperature. When it reaches 180 degrees, remove it from heat and add the vinegar, stiring for about a minute. Curd will begin to form and the whey will start to separate out. Cover the pot and let it sit for about 2 hours. After two hours, ladle or pour the milk mixture into a cheesecloth-lined collander. Allow it to drain for about another 2 hours. After that, it is ready to use!
Tips and Notes:
This was a very fun recipe to throw together, especially with some time on my hands, and yielded about a quart of ricotta cheese. The resulting fresh ricotta cheese has a very nice mild flavor. However, I should have drained it for less time. I think I let it sit a bit longer than 2 hours, and the curds are much firmer than I was expecting. Next time, I may let it sit for as little as 10 minutes, just to get the bulk of the liquid off, but to keep the cheese softer.
I hope you enjoy this recipe!
Support Song Dog Journal and share to social media!
There is something soothing and comforting about a bowl of hot soup on a cold winter day, and with the snow falling and winter setting in, this easy soup is festive and flavorful. I’ve discovered that pumpkin is a lovely addition when cooking, so I wanted to share this unique take on a traditional tomato soup. I’m afraid I’m not a recipe follower, so naturally I’m also not an exact recipe writer, so use your own taste to determine quantity of some of the ingredients. Ingredients
1 15. oz can pureed pumpkin
1 15. oz can of diced (or crushed) tomatoes
~2 cups milk
chicken bouillon to taste
other spices to taste (garlic, minced onion, salt, pepper, savory)
Preparation – Combine pumpkin, tomatoes, and milk in a saucepan and whisk together. If using diced tomatoes, puree with an immersion blender before combining with other ingredients. For a thicker soup, use less milk. For a thinner soup, use more. Add chicken bouillon to taste (I used about a half tablespoon, or less, probably – less is better. You can always add more). Add dried garlic, dried minced onion, pepper, salt if desired, and savory. I’m generous with the garlic and onion. Again, add to taste. Heat and let simmer until all the dried ingredients are tender, about 10 minutes, stirring frequently. Ladle into bowls and garnish with shredded cheese and dried parsley.
I’d like to try this sometime with fresh garlic and onion, and perhaps even add some other vegetables, but for now it makes for a great quick meal!
Enjoy!
Save
Support Song Dog Journal and share to social media!


 Ingredients
